Lista często zadawanych pytań
General questions
What are benefits of a licensed Dr.Web product?
Purchasing a licensed Dr.Web product has certain benefits:
- The manufacturer is responsible for the operation of the software.
- A company using legal software doesn’t violate any property or usage rights.
- Guaranteed free technical support via the web-form.
- Free updates of the Dr.Web virus database.
- Free updates of Dr.Web software modules.
- Free upgrade to a new version.
- A license can be renewed at a discount.
The Dr.Web anti-virus installed on my computer still has a valid license but I’ve got a new computer and want to use the same anti-virus. Can I install it on my new computer?
A DrWeb license for one PC entitles a user to install and run the program simultaneously only on one PC. The number of installations and reinstallations is not limited.
In order to use the license on the new computer do the following:
- copy the Dr.Web key file to a floppy disk or a flash drive;
- download the distribution of Dr.Web anti-virus and install it on your new computer;
- copy the Dr.Web key file from the floppy disk or a flash drive into the anti-virus installation directory;
- remove Dr.Web anti-virus from your old machine.
Two people use the same computer. How many licenses do I need to protect this PC?
You need one license. Dr.Web protect computers, not users. 1 license=1 PC
I have a computer and a laptop but I never use them simultaneously. How many Dr.Web licenses do I need?
You need two licenses because both devices need to be protected.
I have two Windows operating systems installed on my computer. How many licenses shall I buy?
Two licenses — one for each operating system (for each Dr.Web software product).
I use both Windows and Linux on my computer. How many Dr.Web licenses do I need to buy?
Two licenses — one for each operating system (for each Dr.Web software product)
A company has 10 computers used by 18 employees in shifts. How many licenses should the company purchase?
10 licenses. 1 license = 1 PC
License validity period
After registering my copy of the Dr.Web anti-virus on your website, I received a key file. Where should I put it?
Put the downloaded zip file in any folder other than the one in which you installed Dr.Web. Then right-click on the anti-virus icon (spider on green shield) in the system tray near the clock. Select Tools → License Manager.
Press Get new license → From file…; browse to the key's location. Click Open.
After you import the key, restart your computer.
I bought a boxed version of Dr.Web 7.0 (5.0, 6.0). According to your website, the latest version is 8.0. How do I update my Dr.Web to version 8.0?
Regardless of which Dr.Web distribution was in the box you purchased, you can use the latest version of the anti-virus (as soon as you register your serial number on our website and receive a license key file). The latest distribution can be downloaded from our website: https://download.drweb.com.
If you haven't installed Dr.Web yet, just launch the downloaded file. During installation, enter your license’s serial number.
If the anti-virus is already installed, but you want to upgrade to the latest version, you should run the installer of the new version. When the installer detects an outdated version, it will remove it. After a system restart, the newly installed version of Dr.Web will start automatically.
Renewal
Can I register my renewal license’s serial number before my current license expires? If so, won’t that shorten my current license period?
You can register a renewal license’s serial number at any time, even before your current license expires. During registration, the remaining period of the current license will be added to the renewal licence’s term automatically. All you need to do is specify your current serial number or the key file used with the Dr.Web anti-virus.
Can I renew a beta version at a discount?
Renewal discounts are not available to users of beta versions but only to users of commercial Dr.Web licenses. Licenses for tested products are provided for free to the best beta testers.
Can I renew a license at a discount after it has expired?
There are no renewal restrictions as to how long ago your license has expired. You can renew it at a discount in several months or even years after its expiration.
Can a company renew its license for the Dr.Web anti-virus via the eStore? If so, can a invoice be obtained for accounting purposes?
Legal persons purchasing Dr.Web from the eStore can get hard copies of invoices for their purchases.
How do I renew a commercial license?
- If you have a license for one of the personal Dr.Web anti-viruses, simply buy a renewal license from one of partners of Doctor Web or the Dr.Web eStore. The price of a renewal license already includes the discount.
IMPORTANT! You can also purchase a standard, full-priced license. If you have used Dr.Web before for at least six months and specify during registration your previous serial number or key file, the new license period will be 150 days longer than specified on the box/in the license.
If you have purchased a renewal license (its price already includes the discount) but can't specify a previous serial number or key file whose period of use was/is at least six months in duration, the period of your new license will be 150 days shorter than specified on the box/in the license.
- If you use a Dr.Web bundle, you can't apply for the renewal discount since special low prices are set for Dr.Web bundles by default.
- If you use any other Dr.Web product, please visit the renewal page.
I need to provide a key file to renew my license. What is a key file and where can I find it?
A key file is a special file containing information about the Dr.Web components covered by your license and your license period. The file has the .key extension and is located in the Dr.Web anti-virus installation directory. In Windows, the default location is C:\Program Files\DrWeb\drweb32.key.
I purchased a Dr.Web license at a special lower price. Can I still renew at a discount?
If your license is valid for at least six months, you, as well as any user of Dr.Web, can renew your license at a discount.
I purchased a Dr.Web license under the "Switch to Green" migration programme. Can I renew my license at a discount?
All registered Dr.Web users are entitled to a renewal discount. The discount amount depends on the period of your renewal license.
If I purchase two three-month licenses and register both serial numbers, would I qualify for a six-month license renewal?
It depends on the date of registration of your serial numbers. If you register both numbers on the same day, the license periods will start and expire in three months. If you register one serial number and register the second one three months later, you will be using licensed Dr.Web software for six months. But this may not be a good idea since you won't be able to get a renewal discount for two three-month key files, and two short-term licenses will cost you more than one six-month license.
Low-cost renewal terms
- Both valid and expired licenses can be renewed. There is no expiration date limitation for Dr.Web licenses subject to renewal.
- A renewal discount is provided only if the period of the previous license was/is at least six months in duration.
- A renewal discount is provided only if a license for a similar Dr.Web anti-virus for 1, 2, or 3 years is purchased.
- For Dr.Web Security Space and Dr.Web Anti-virus a renewal discount is provided for any number protected objects (from 1 to 5 inclusive).
- A renewal discount is provided for protected objects whose number is less than or equal to the number of protected objects covered by the previous license that is subject to renewal.
- To get a discount, a Dr.Web key file or a serial number must be provided (each such file or number can be submitted for renewal only once).
- To get a renewal discount, a customer must present a serial number or a key file (including OEM) to a salesperson.
My Dr.Web license expired before I renewed it. When would the term of my renewed license start?
If you renew an expired license, the renewal period will start as soon as you register the serial number of the new license.
How to transfer a Dr.Web licence from one device to another
Dr.Web Enterprise Security Suite
To transfer a license from one computer to another, save the license key file onto removable media. More information about using key files for each product:
Dr.Web Desktop Security Suite
- For Windows: download.geo.drweb.com/pub/drweb/windows/8.0/doc/wks/en (the section Management and Configuration)
- For Mac OS X download.geo.drweb.com/pub/drweb/mac/doc/wks/en/ (Installation and Removal)
- For Linux: download.geo.drweb.com/pub/drweb/unix/doc/HTML/ControlCenter/en (Installation and Removal)
Dr.Web Server Security Suite
- For Windows: download.geo.drweb.com/pub/drweb/windows/server/8.0/doc/HTML/en (Management and Configuration)
- For Novell Netware: download.geo.drweb.com/pub/drweb/novell/doc/drweb-nw-501-en.pdf (Licensing)
- For Unix: download.geo.drweb.com/pub/drweb/unix/doc/HTML/Samba/en (Startup of Dr.Web for Unix file servers)
- For Novell Storage Services: download.geo.drweb.com/pub/drweb/unix/doc/HTML/NSS/en (Software Registration. License Key File)
- For Dr.Web for Mac OS X Server: download.geo.drweb.com/pub/drweb/mac/doc/server/en (Installation and Removal)
Dr.Web Mail Security Suite
- For Unix: download.geo.drweb.com/pub/drweb/unix/doc/HTML/MailD/en (Software Registration. License Key File)
- Dr.Web for MS Exchange download.geo.drweb.com/pub/drweb/exchange/HTML/en (Licensing)
- Dr.Web for IBM Lotus Domino (Windows) download.geo.drweb.com/pub/drweb/lotus/HTML/win/en (Installation and Removal)
- For IBM Lotus Domino (Linux): download.geo.drweb.com/pub/drweb/lotus/HTML/unix/en (Installation and Removal)
- For Kerio (Windows): download.geo.drweb.com/pub/drweb/kerioms/HTML/win/en (Licensing)
- For Kerio (Linux): download.geo.drweb.com/pub/drweb/kerioms/HTML/linux/en (Licensing)
- For Kerio (Mac OS X): download.geo.drweb.com/pub/drweb/kerioms/HTML/macos/en (Licensing)
Dr.Web Gateway Security Suite
- For Kerio: download.geo.drweb.com/pub/drweb/keriowr/HTML/en (Licensing)
- For Unix: download.geo.drweb.com/pub/drweb/unix/doc/HTML/ICAP/en (Software Registration. License Key File)
- For Qbik WinGate: download.geo.drweb.com/pub/drweb/wingate/HTML/en (Licensing)
- For MIMEsweeper: download.geo.drweb.com/pub/drweb/mimesweeper/HTML/en (Licensing)
- For Microsoft ISA Server and Forefront TMG (Anti-virus & Anti-spam): download.geo.drweb.com/pub/drweb/isa-tmg/6.0/docs/drweb-601-isa-20042006-tmg-2010-en.pdf (Licensing)
- For Microsoft ISA Server and Forefront TMG (Anti-virus): download.geo.drweb.com/pub/drweb/isa-tmg/6.0/docs/drweb-601-isa-20042006-tmg-2010-light-en.pdf (Licensing)
Dr.Web Mobile Security Suite
- For Windows Mobile: download.geo.drweb.com/pub/drweb/wince/HTML/en (Licensing)
- For Android: download.geo.drweb.com/pub/drweb/android/pro/HTML/en (Licensing)
- For Symbian OS: download.geo.drweb.com/pub/drweb/symbian/drweb-symbian-s60-en.pdf (Licensing)
Dr.Web Mobile Security
If you purchased Dr.Web for Android via Google Play
To transfer your license to another Android device, use the device to log in on Google Play under the account you used to purchase the license. Then select your Dr.Web product on Google Play and click "Install". The license will be recognized automatically.
Boxed products
Customers who purchase any boxed Dr.Web product are entitled to use Dr.Web Mobile Security free of charge. If you've lost your device or bought a new one, you can transfer your license to another device. Download and install the corresponding Dr.Web program on the device. Copy the key file obtained when registering your boxed Dr.Web anti-virus into the installation directory of your Dr.Web for a mobile device.
Single-user licenses and OEM
Buyers of Dr.Web Mobile Security may transfer the license to another mobile device in the event of loss/acquisition of a new device. Download and install the corresponding Dr.Web program on the device. If you have purchased an e-license in an online store, you can find the serial number in the e-mail you received from the store. Copy the key file obtained when registering your electronic license into the installation directory of your Dr.Web for a mobile device, or enter the serial number.
Demo
Free demo licenses are not transferable.
Dr.Web Security Space and Dr.Web Anti-virus (boxed products or e-licenses)
Boxed products
To transfer a license from one computer to another, save the serial number or license key file onto removable media. To do this, right-click on the Dr.Web icon located in the system tray, and in the context menu, select Tools – License Manager. In the Manager window, you will see the name of the key file. Save it from the computer’s local directory to removable media.
If you purchased a Dr.Web product on tangible media in a box, you can find the serial number in the “Serial number” field of your license certificate. If the Dr.Web product has been removed from the computer, you can use the license key file to activate the license on another machine. The file's extension is .key. It is stored in the product's installation folder (Program Files\DRWEB). The folder is not deleted after the removal of a product. Use the License Manager of the Dr.Web product installed on another computer to add the key file or enter a serial number.
Electronic licenses (including OEM licensess)
To transfer a license from one computer to another, save the serial number or license key file onto removable media. To do this, right-click on the Dr.Web icon located in the system tray, and in the context menu, select Tools – License Manager. In the Manager window, you will see the name of the key file. Save it from the local directory computer to removable media.
If you have purchased the e-license in an online store, you can find the serial number in the e-mail you received from the store. If the Dr.Web product has been removed from the computer, you can use the license key file to activate the license on another machine. The file's extension is .key. It is stored in the product's installation folder (Program Files\DRWEB). The folder is not deleted after the removal of a product. Use the License Manager of the Dr.Web product installed on another computer to add the key file or enter a serial number.
Demo
Free demo licenses are not transferable.
General information
Terminating use of a license when switching PCs/Macs
Users of Dr.Web who have commercial or OEM licenses can transfer their license from one computer to another, provided that they stop using Dr.Web on the machine from which the license has been transferred, once the license to the other computer has been activated.
Free demo licenses are not transferable.
If you intend to install Dr.Web on another computer, it is recommended that you download the latest distribution version beforehand. To do so, use the option “Download full version”.
My license (serial number) is lost. How can I transfer my license?
If you don't have a license certificate, an e-mail from your retailer of the e-license or a license key file, you can contact Doctor Web support to retrieve your serial number’s license. To do this, on the support page select "I am a registered user of Dr.Web". Then click on the link "Key file or serial number is lost?". Follow the instructions.
Transferring a license after a computer has been repaired
It is recommended that you delete the license key file before handing over your computer for repair to make sure that your license does not end up in someone else's possession. To do this, right-click on the Dr.Web icon located in the system tray, and in the context menu, select Tools – License Manager. In the Manager window, you will see the name of the key file. Move the file from the local directory onto a removable drive, and then use the License Manager to remove the license. Once repairs are done, use the license manager of your installed Dr.Web anti-virus to add the key file.
I'm going to format my hard drive. How can I save my license?
Save the key file on a removable data storage device before you format the disk. To do this, right-click on the Dr.Web icon located in the system tray, and in the context menu, select Tools – License Manager. In the Manager window, you will see the name of the key file. Save it from the computer’s local directory to removable media. After formatting, download the latest version of the distribution. To do so, use the option “Download full version”.
Demo version
I'm using a demo version. What can I do if I have any questions about the program?
All products developed by Doctor Web come with comprehensive user manuals. To download a manual for the anti-virus installed on your PC, look for the product’s description in the Download section of www.drweb.com. Open a corresponding page and download the manual from the Documentation section.
If you can't find an answer to your question in the documentation, please go to the Frequently asked questions section or contact the Technical Support service.
I'm using a demo Dr.Web anti-virus. Since yesterday an anti-virus usage period expiry message appears whenever I reboot the system. What's happened?
This message means that the thirty day trial period is over. You need to either remove the anti-virus, or purchase a licensed version of Dr.Web.
Do I need to remove the trial version from my computer before I install the licensed version?
Removing the program from your computer is not necessary. To turn a trial copy of Dr.Web into a licensed version, you need to purchase a license and register it. Right click on the Dr.Web icon in the system tray and select Register in the context menu. During registration you will need to choose the option Obtain a license key file with serial number. Once you have entered your serial number, a key file will be downloaded to your computer automatically. An Internet connection is required for registration.
I'm using a demo version of an anti-virus from another company. Can I change it for Dr.Web at a discount under the promotional offer "Switch to the green"?
No. In order to migrate to Dr.Web anti-virus at a discount provided under this programme, you need a commercial license for a different anti-virus. Find out more about the "Switch to the green!" programme here.
The program informs me that the demo expires, even though I bought a commercial license (license renewal) and registered it. What shall I do?
If you already have registered your serial number, do the following:
Right-click on the Dr.Web icon in the notification area. In the context menu, select Tools–> License Manager. In the License Manager you need to remove the demo license (key file drwdemo.key) and reboot the computer.
Recovering a blocked key file
How to restore a magazine license , demo or OEM license
These are non-commercial licenses (they are not for sale) and, therefore, cannot be restored.
To continue using Dr.Web, purchase a commercial license in the Dr.Web eStore or from an authorized Doctor Web partner.
If you access the service to restore a blocked key file via My Dr.Web Portal
- Log into My Dr.Web Portal—select the appropriate option from the menu of your Dr.Web application.

- Go to the ‘Licenses’ section, and in the ‘Blocked’ tab, select ‘Replace serial number’.


What happens next?
A new serial number will be sent to the email address you specified when you registered the serial number.
IMPORTANT! If you no longer use this email address, contact Doctor Web's Technical Support Service to replace your license.
If you've already used the one-time option to restore your license free of charge
If your license has been blocked because of piracy, it means that you violated the terms of the license that enabled you to use the Dr.Web key you received when you registred your serial number. You have violated terms in clauses 5.1. and/or 5.3 of the Doctor Web software usage agreement you accepted when registering your Dr.Web serial number.
clause 5.1… The software can only be used within a specified period of time, under a defined operating system and with the number of protected objects specified in the license key file, and in accordance with other parameters specified in the file.
clause 5.3… You can store no more than two backup copies of a license key file. You may not give these copies to a third party or place them on tangible media that is accessible to a third party or make the files accessible to the public over the Internet or by any other means. If a valid key file is found to be in the public domain, the Rights Holder is entitled to render a software copy non-operational and disable its features.
If you have already used the one-time option to restore a Dr.Web key file and wish to continue using Dr.Web, you need to renew or expand (if necessary) your blocked license — via the Dr.Web eStore or an authorized partner of Doctor Web.
In either case, you will get a renewal discount — starting at 40% for a one-year license.
Can I use a key file for 32-bit version of Dr.Web with a 64-bit version?
Yes, you can. The key doesn't depend on an OS version.
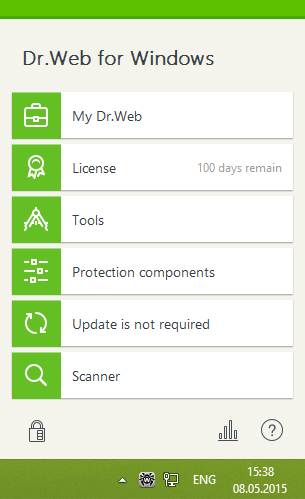
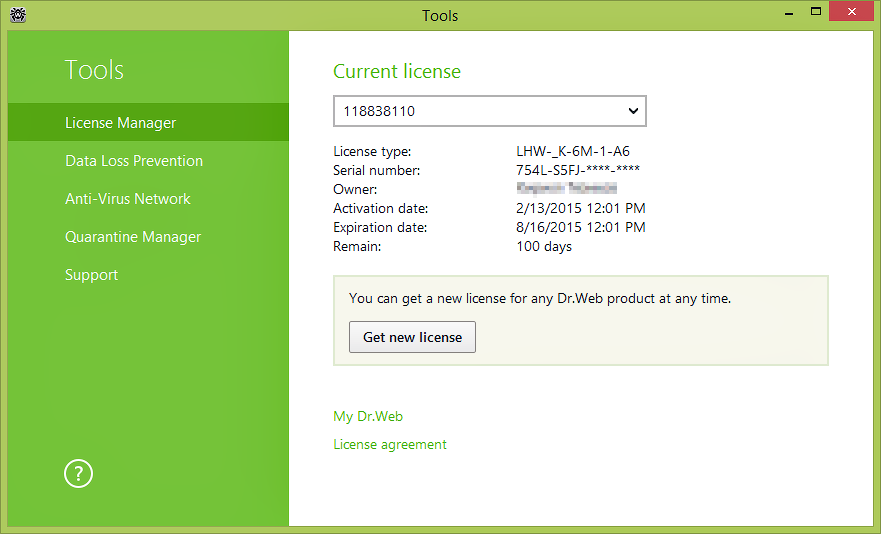
How can I learn the license validity period?
Right-click on the Dr.Web icon in the system tray and select Tools–> License Manager. In the subsequent window you will see all the information about the current license, including its expiration date.
How can I register a serial number if my computer is not connected to the Internet?
To register your serial number and obtain a license key file, you need to access the Internet. This can be done not only from the computer on which you installed Dr.Web, but also from any other PC connected to the Internet.
Go to the registration page Enter your serial number. If you are registering a license renewal, specify the serial number or the license key file of the previous license. Fill in the personal data fields. After registering on our website, you will be able to download the archive drweb32.zip which contains your license key file drweb32.key. Download this file and transfer it to your computer.
- If Dr.Web is already installed in the system, right-click on its icon in the system tray and select Tools → License Manager (if the License Manager item is not available, switch to administrative mode). In the License Manager window, click Get new license; select From file, and navigate to the folder into which you extracted your key file.
- If Dr.Web isn't installed on your computer yet, download the distribution from our website and run the installation file, specifying the path to the saved key file during installation.
How can I register a serial number if the Dr.Web anti-virus is not installed on my computer?
Download the distribution from our website and run the installation file. Specify your registration information during installation and you will receive a key file.
How do I learn my serial number?
If you use Dr.Web for Windows, you can find your serial number in the personal data section of your My Dr.Web personal area. If you useanother Dr.Web product, your serial number must be specified in the license certificate. To recover a lost serial number, please contact the organization from which you purchased a corresponding Dr.Web license.
How do I register Dr.Web serial number if my computer has no connection with the Internet?
It is impossible to register Dr.Web serial number without access to the Internet, but you can do it from any computer, if your PC does not have a connection to the Internet.
Visit https://products.drweb.com/register/ . and register there your Dr.Web serial number. If you register a renewal number, you should also submit your current (or expired) key file. After the registration you will see a link from where you can download the archive called drweb32.zip with your license key file ( drweb32.key ). Download this archive, copy it on a diskette or burn on a CD and save it in your computer and extract the key file into Dr.Web installation directory.
-
If Dr.Web is already installed in your computer
Extract your license key file (called drweb32.key) from the archive (called drweb32.zip) into Dr.Web installation directory and reboot your PC. -
If Dr.Web is not installed in your computer
Extract your license key file (called drweb32.key) from the archive (called drweb32.zip) into some directory in your computer. Launch Dr.Web installation procedure from the distribution. At one stage of installation you will be asked to show location of your license key file. Browse for your license key file and continue installation of Dr.Web – your license key file will be installed automatically.
IMPORTANT!!! Do not forget – at least once a month – to download new distribution of Dr.Web, as its engine, components, help files are also get updated, not only its virus base.
How do I register a license for two computers?
- If you have one license for multiple PCs, then use your serial number to get a key file on all computers.
- If you have 2 licenses, then use different serial numbers on different computers during the installation.
How do I register a purchased serial number if my demo key has not expired?
Click on the anti-virus icon in the system tray and select Register license. Then enter your serial number and the other information required for registration. The anti-virus will download the key file automatically.
How do I register a serial number if the Dr.Web anti-virus is already installed on my computer and the license key has expired?
Click on the anti-virus icon in the system tray and select Register license. Then enter your serial number and the other information required for registration. The anti-virus will download the key file automatically.
How do I register if I do not have Dr.Web Anti-virus installed on my PC?
You may choose either option. You may download the Dr.Web anti-virus from the Download section of Dr.Web www-site and then register the serial number and receive a key file. You may also first register the serial member and receive Dr.Web key file. In this case, you should unzip and save this key file into known to you location. Then you should download and install the Dr.Web anti-virus. During the installation you should omit the registration procedure. When the installation completed place the license key file to Dr.Web installation directory (in MS Windows it is usually C:\Program Files\DrWeb).
How do I register if I have already Dr.Web Anti-virus installed on my PC, but the license key expired?
To register a Dr.Web serial number you can choose either option.
- Use the registration utility integrated into Dr.Web for Windows package To launch the utility manually, right-click the SpIDer Guard's icon in the system tray and choose the "Register" menu item. Follow the registration procedure and input the serial number into appropriate fields of the registration form. Your Dr.Web key file will be downloaded and installed automatically. You should not register again at this page.
- Use the registration web-form below Kindly fill out the registration web-form below. Immediately after the registration, a license key file will be sent to the e-mail address specified by you during the registration. Unzip the key file from the archive and place it to the Dr.Web installation directory (in MS Windows it is usually C:\Program Files\DrWeb). When installed, the key file will have a .KEY extension. It will also be available on the page which will be displayed after you submit the necessary registration data to our server. Please save the copy of the license key file in a safe place such as a floppy, or USB disk, or a memory card.
How do I register if I my Dr.Web demo-key file is still valid?
Kindly register your new serial number at www-server of Doctor Web, Ltd. Fill out attentively all the fields required. After the registration completed, immediately a license key file will be sent to your e-mail address. Unzip the key file from the archive and place it to the directory the Dr.Web anti-virus is already installed (in MS Windows it is usually C:\Program Files\DrWeb). A program will ask if demo key file should be replaced with the new Dr.Web license key file. Confirm the replacement. Dr.Web license key file will be placed to the Dr.Web installation directory (in MS Windows it is usually C:\Program Files\DrWeb).
I am seeing this message: “The specified file is not a registry data file. You can import only binary registry data”.
The license key file drweb32.key really is not a registry file; therefore, there is no need to open it or add its contents to the registry. Right-click on the anti-virus icon (spider on green shield) in the system tray near the clock. Select Tools → License Manager. Press Get new license → From file…; browse to the key's location. Click Open.
After you import the key, restart your computer.
What do I do if by mistake I deleted a key file?
Get the key file the same way you did the first time. Right-click on the Dr.Web icon in the system tray and select Tools–> License Manager. In the subsequent window click Get a new license and select Via the Internet. In the resulting window, select Obtain a license key file, then enter your serial number and click Next. If the number you've entered is correct, the key file will be automatically installed on your computer.
What do I need to do first? Register a serial number and get a key file, or download and install the Dr.Web anti-virus?
It is recommended that you first download the Dr.Web anti-virus distribution and then, during installation, register the serial number.
Dr.Web key file
How can I swap out my expired/expiring Dr.Web key file (or serial number) for a new one when I renew my license or expand its coverage?
Before proceeding, connect to the Internet.
Click on the mini-agent icon (the spider) in the system tray.

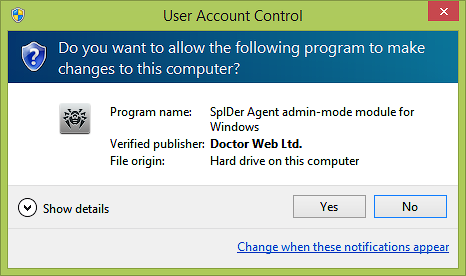
In the mini-agent menu, click on the padlock icon.
Depending on your Windows settings, you may be prompted to elevate user permissions. If you are prompted to do so, press Yes.
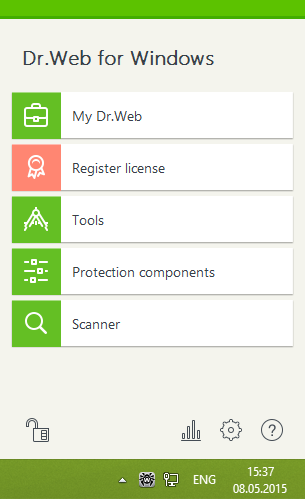
The image of the closed padlock will change to an open one. Click License (Register license).
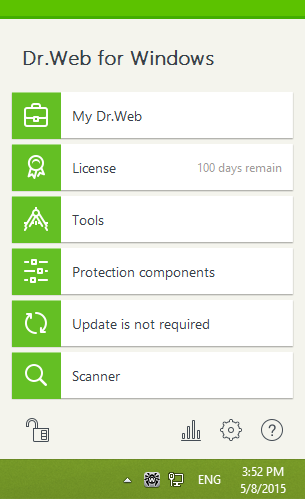
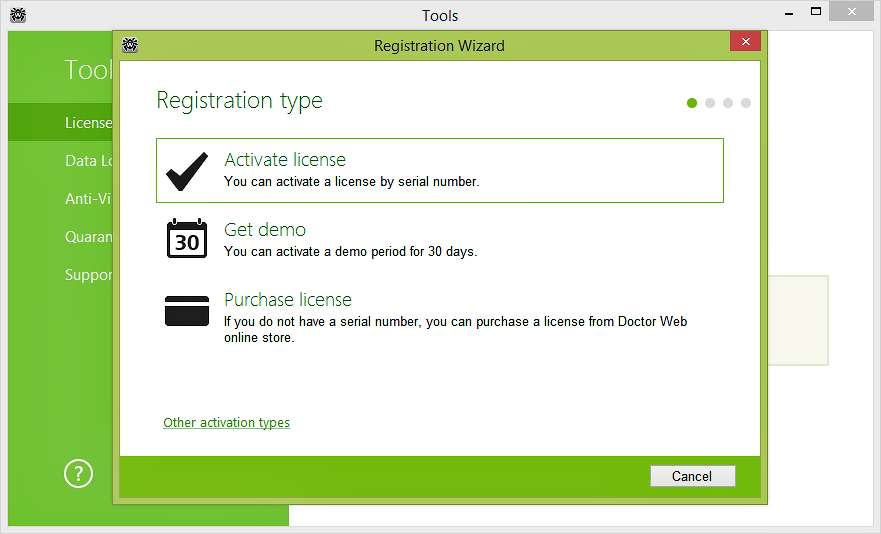
The License Manager window will open. Press Get new license.
The Registration Wizard window will open. Click Activate License.
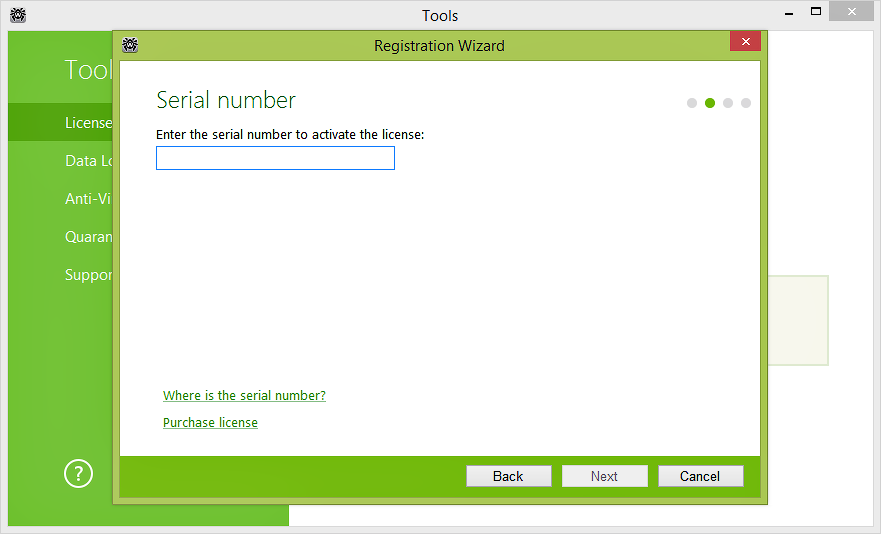
Enter your serial number, and press Next.
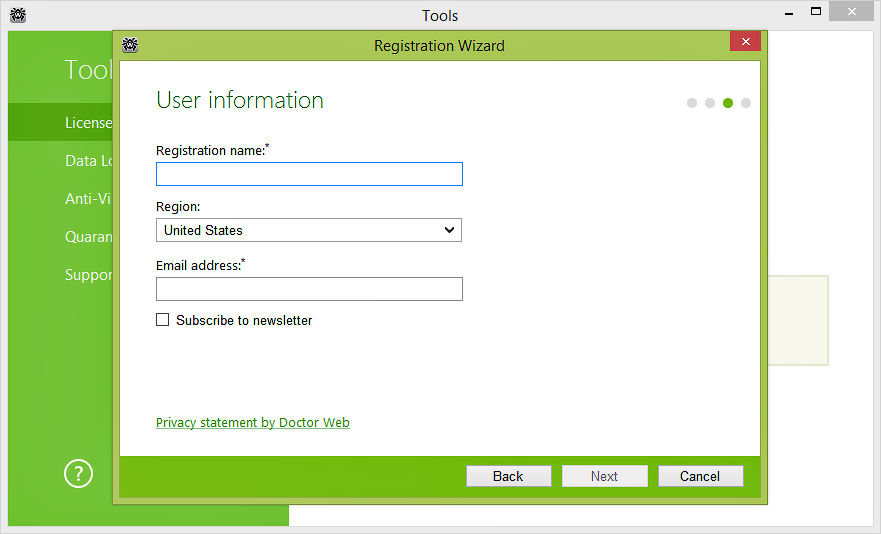
Fill out the registration form, and click Next.
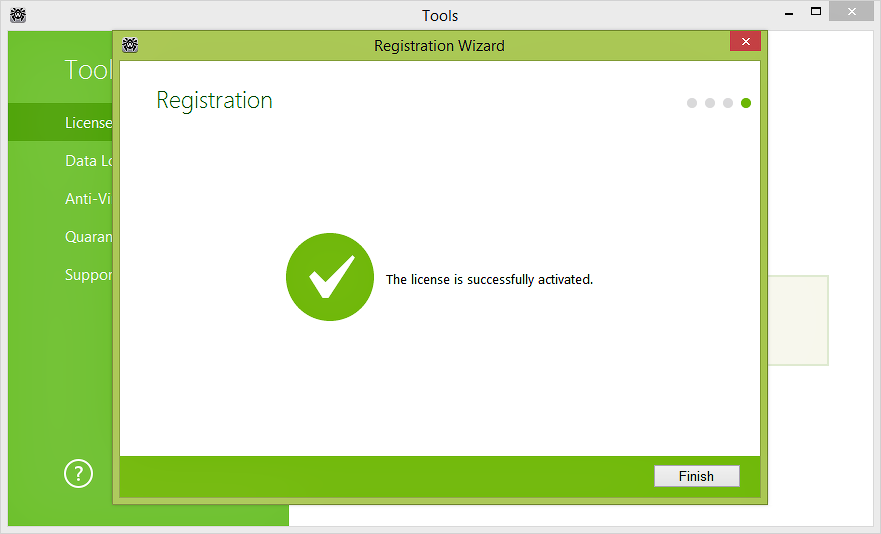
The serial number will be registered. Click Finish.
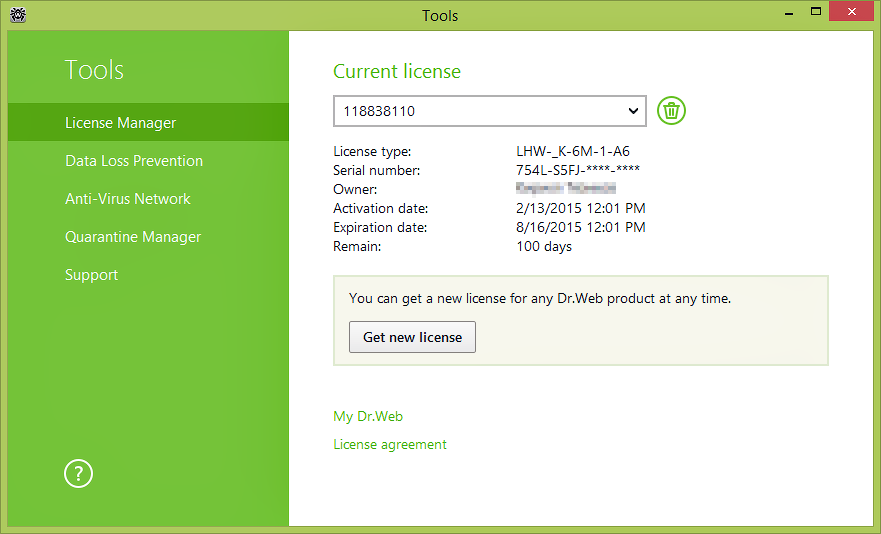
If necessary, delete the information about the previous license. In the License Manager window, open the drop-down list Current license and select the previous license.

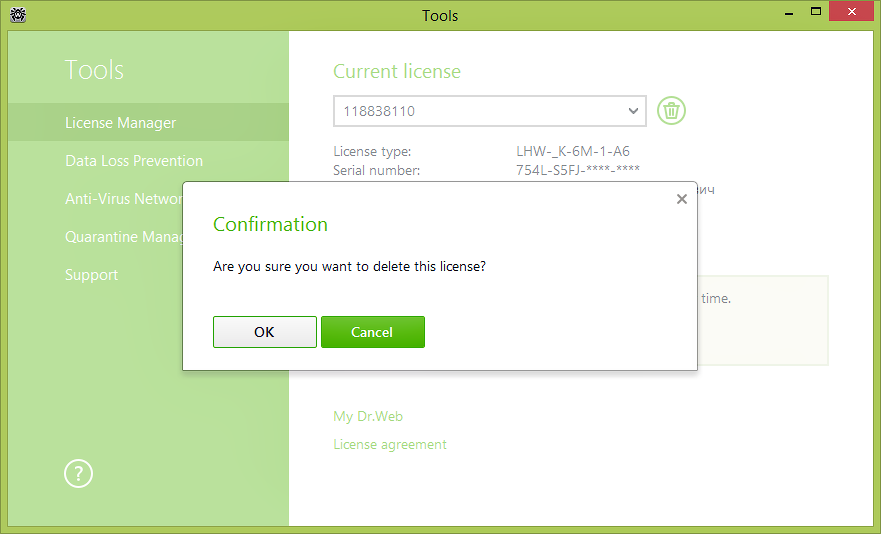
Click on the Recycle Bin button.
Confirm your intention to delete the license information. Press OK.
The information about the previous license will be deleted. If necessary, you can remove information about other old licenses by doing the same thing.

As a result, only one license (the current one) will remain. Please note that if only one license is listed, information about it can't be deleted. Close the application window.
Dr.Web for Windows
How can I configure Dr.Web so that I can access the protected system remotely?
Dr.Web for Windows 11.5:
- Click on the Dr.Web icon in the notification area (in the lower-right corner of the screen).
- Click on the padlock icon (Administrative mode) to allow the application to launch.
- Click on the gear icon (Settings), and then click on General → Self-protection.
- Toggle off the Block user activity emulation option.

Dr.Web for Windows 12:
- Click on the Dr.Web icon in the notification area (in the lower-right corner of the screen).
- Select Security Center, and click on the padlock icon (Administrative mode) to allow the settings to be changed.
- Click on the gear icon (Settings) in the top-right corner of the installer window, and then click on Self-protection.
- Toggle off the Block user activity emulation option.

You can also toggle off this option during the anti-virus installation process in the Installation parameters section — in the Advanced options tab.

Installation
How can I install anti-virus?
Prior to the installation, we strongly recommend doing the following:
- Install all the critical updates released by Microsoft for your operating system (updates can be downloaded from the Microsoft update site);
- Use system tools to check the file system and fix problems, if any;
- Close other running applications.
To run the installation in normal mode, use one of the following:
- If the installation kit is a single executable file, launch the file.
- If the installation kit is furnished on a branded disk, insert the disk into your optical drive. If autorun is enabled, the installation procedure will start automatically. If autorun is disabled, launch the autorun.exe file located on the disk. The autorun window will appear.
Then proceed with the following steps:
- Press Install.
Follow the installation wizard instructions. At any installation step before file copying process is started you can use the two buttons:
- Press Back to return to the previous step;
- Press Next to move to the next step;
- Press Cancel to cancel the installation.
How can I know the version of the anti-virus I have installed?
In order to check the version number, right-click on the Dr.Web icon in the notifications area and select About. In the next window, you will see the Dr.Web version number and all the modules versions as well.
I have purchased Dr.Web Anti-virus license.Which of your products shall I install?
When purchasing our anti-virus, you obtain a certificate indicating which product the license you have bought is applied to. So, you need to install the product indicated.
I want to reinstall an operating system. My Dr.Web license has not expired yet. How can I recover my Dr.Web license on the new OS?
There are two ways to do it:
- Disable anti-virus self-protection (right-click on the Dr.Web icon in the notifications area, select Disable self-protection, enter digits from the CAPTCHA and press Disable self-protection), then copy the drweb32.key key file from C:\Program Files\DrWeb (or the anti-virus installation folder) to a removable media. After that, locate the drweb32.key file path during the anti-virus installation the new OS.
- Download the latest Dr.Web version from our website and launch the installation. During the installation, enter your serial number; the key will be downloaded and installed automatically.
My notebook CD-DVD drive is absent/broken. How can I install box version of anti-virus I have purchased?
In this case, you need to download the latest anti-virus distribution file from our website and install it.
What is the difference between default and custom installations?
In default installation, all the anti-virus package components are automatically installed into C:\Program Files\DrWeb\ folder.
In custom installation, you can specify the list of components to be installed (e.g. you may choose not to install a firewall if you don’t need it), select installation folder and configure update server.
When installing anti-virus, I see the following message: “Instmsi30.exe not found”. What am I to do?
To have this error fixed, you need to download and install an update for Windows, and then restart anti-virus installation.
Why can’t I keep another anti-virus on my PC while installing Dr.Web?
It is not allowed to install several anti-virus programs on one PC at a time — they will conflict with each other that may considerably slow down you PC or make it completely non-operational. If you have an anti-virus software already installed on your PC, but intend to install a new product from another vendor, then you need to remove the anti-virus program you have, prior to the installation.
If you wish to install another anti-virus program, you do it at your own risk, and become responsible for all the consequences because the consequences of such installation might be unpredictable including inability of your OS to boot as a result of two or more anti-viruses installed on your PC.
Components Dr.Web
After installing the anti-virus I have found out that the module for self-defense hasn't been installed. What shall I do?
If you have not installed the self-protection module, do the following:
- Download the latest version of the curing utility Dr.Web CureIt and run a full scan. Cure detected infected objects and delete or move to the qurantine incurable malicious objects.
- After that you need to reinstall the anti-virus. Open Add and Remove Programs (Windows 2000 \ XP) or Programs and Features (Windows Vista / 7) in the Control Panel, and remove Dr.Web anti-virus. After rebooting, go to C: \ Program Files \ DrWeb (or another folder into which Dr.Web has been installed) and remove all files and folders, but the license key file drweb32.key.
- After that, download the latest distribution of the antivirus program and install it. To register, use the saved key file.
Can I remove viruses from the quarantine? How can I do it?
Quarantined files can be deleted by selecting the desired file and clicking Delete. It will remove the file from the quarantine and from the system.
Dr.Web for Windows encompasses many programs. Which of them actually protect against viruses and which are subsidiary?
A Dr.Web anti-virus is a set of programs, each of them protects its own section in your computer's defense. Removing or disabling at least one component greatly reduces the reliability of anti-virus protection in general, so we strongly advise you not to disable any of its modules unless absolutely necessary.
How can I disable the self-defense?
To temporarily disable self-protection, right-click on the Dr.Web icon in the system tray and in the context menu select Disable self-protection (if this feature is unavailable, please switch to the Administrative Mode and try again). A window will appear where you'll need to enter numbers from the picture and click Disable self-protection.
Caution! Disabling self-protection is not recommended, activate it again as soon as possible.
How do I restore a file from the quarantine?
Right-click on the Dr.Web icon in the system tray and select Tools–> Quarantine. In the subsequent window select the file and click Restore.
I have a strong suspicion that a virus has gotten into my computer. How can I run the scanner?
There are several ways to start the scanner.
- The scanner shortcut (the icon with a spider on the green field) is placed on the desktop during Dr.Web installation. Double-click on the shortcut and the scanner will start.
- The green spider icon is displayed in the system tray. Right-click on the icon. In the context menu, select Scanner; the scanner will start.
- Run the scanner via Windows Explorer to scan a specific object (file or folder). Right-click on the file or folder you want to scan. In the context menu, select Scan with Dr.Web (the item with the red spider icon). The Scanner will start immediately and the file will be scanned.
- Check the specific object (file or folder) you’ve found by dragging it onto the scanner icon or its open window when custom scan is selected.
In the scanner settings, there is an option to process infected and incurable files — Move to quarantine. Does this mean that such files are moved to some location within my computer? In other words, does this mean that my computer is still infected with a virus?
In respect to infected and incurable objects, the Move action does the following: The file is moved to a special quarantine folder. Furthermore, once moved, the file loses its extension. The virus is literally disarmed and rendered non-operational and, therefore, harmless. Later, you can open the Quarantine Manager and delete the files if you do not need them.
My anti-virus has found suspicious files and sent them in quarantine. What can I do to get rid of the viruses?
Quarantined viruses are not dangerous because they can't be launched. If you want to permanently delete infected files, clean the quarantine:
- If you are using Dr.Web for Winidows 5.0 and Dr.Web Security Space 5.0: remove all objects from the infected!!! folder, located in the anti-virus's installation folder.
- If you are using Dr.Web for Winidows 6.0 and Dr.Web Security Space: right-click on the Dr.Web icon in the system tray and select Tools–> Quarantine. In the subsequent window select the files you want to remove and click Delete.
- If your anti-virus is Dr.Web CureIt!, remove all objects from the C: \ Documents and Settings \ _your_user_name_ \ DoctorWeb \ Quarantine folder.
What is a self-protection module what is it for?
Dr.Web SelfPROtect protects the modules, processes, and branches of the registry used by Dr.Web for Windows from outside interference. The outside interference includes incompetent user actions that may render the anti-virus non-operational or make it malfunction as well as actions taken by anti-antiviruses that may terminate anti-virus processes, modify and remove its files and delete Windows Registry branches related to Dr.Web. Disabling the self-defense is not recommended!
What is the quarantine?
The quarantine is a special folder where the anti-virus stores suspicious and infected files. Suspicious files are stored to be later sent to Doctor Web's laboratory for analysis, infected files get into the folder if their removal and curing is impossible for some reason.
Where can I find files for which I have chosen the "Move" action?
- If you use Dr.Web for Windows 5.0 and Dr.Web Security Space 5.0 the quarantine folder name is infected!!!, It is located in the anti-virus installation folder (default path C: \ Program files \ Drweb).
- With Dr.Web for Windows 6.0 and Dr.Web Security Space access to the quarantine is only available through the program interface. To access the quarantine, right click on the Dr.Web icon in the system tray and select Tools–> Quarantine.
- Dr.Web CureIt! placed quarantined objects into C:\Documents and Settings\_Your_user_name_\DoctorWeb\Quarantine.
Where does Dr.Web move infected files?
Infected files are moved to a special storage — Quarantine — from where you can remove the file if necessary, restore it to its original location or send it for analysis in our virus lab.
Where is the quarantine located?
- If you use Dr.Web for Windows 5.0 and Dr.Web Security Space 5.0, the quarantine folder name is infected!!!, It is located in the anti-virus installation folder (default path C: \ Program files \ Drweb).
- With Dr.Web for Windows 6.0 and Dr.Web Security Space access to the quarantine is only available through the program interface. To access the quarantine, right click on the Dr.Web icon in the system tray and select Tools–> Quarantine.
- Dr.Web CureIt! places quarantined objects into C:\Documents and Settings\_Your_user_name_\DoctorWeb\Quarantine.
Why does Dr.Web simply delete Trojan horses but doesn't cure them?
To answer this question, you need to understand the difference between viruses and Trojan horses. Typically, a virus adds (appends its code) itself to an infected file so it incorporates its own code and the virus's code. Together they represent a virus-infected file. Most of these files can be cured by the Dr.Web anti-virus. Here we speak about curing files of viruses rather then curing viruses.
A Trojan horse is a complete malicious program. It doesn't inject its code into files but operates as a separate program, that's why it can't be cured but removed. Some Trojan programs compromise various system objects such as the Windows Registry. In this case we can speak about curing the system (but not the Trojan horse), which includes removing the Trojan and restoring the compromised objects to their healthy state.
Uninstall
Can I always use Dr.Web Remover? It is really faster!
The utility is not designed to be used as a main Dr.Web software uninstallation tool. Dr.Web Remover utility is a damaged Dr.Web version emergency removal tool. The anti-virus is recommended to be uninstalled with the standard Windows tools.
Due to a system error, the anti-virus turned damaged and cannot be removed. How can I fix it?
If the installed version of Dr.Web Anti-virus was damaged for some reasons and cannot be removed in a regular way — please use the Dr.Web Remover emergency removal utility. Run Dr.Web Remover, enter the code from the CAPTCHA (it is necessary in order to confirm that is the user, not application, who attempts to remove antivirus) and press Remove.
I need to remove anti-virus. What shall I do?
Like any other program, Dr.Web Anti-virus can be removed with standard operating system tools:
- In Windows 2000/XP: From Menu–>Control Panel–>Add/Remove programs.
- In Windows Vista/7: From Menu–>Control Panel–>Programs and Features.
If you were unable to remove the anti-virus in such a way, please use a special Dr.Web Remover utility, which can be downloaded here.
Which products can I remove with the Dr.Web Remover utility?
Dr.Web Remover is intended to be used to delete the results of incorrect/damaged installations of Dr.Web for Windows. The supported versions are 4.33, 4.44, 5.0, 6.0, 7.0, and 8.0. The utility can also be used with the same versions of Dr.Web Enterprise Suite client software when standard removal tools are not available or do not work.
SpIDer Gate
A connection failure occurs when I try to download a program. If I turn off SpIDer Gate, downloading continues without interruptions. What shall I do?
Try running SpIDer Gate with the -dbg: 2 parameter. To do this, click Start-> Run, type in the string provided below:
"C:\Program Files\DrWeb\spidergate.exe" –dbg:2
Click Ok.
If the problem persists, please contact the technical support service.
Can the firewall do Spider Gate's work?
No, SpIDer Gate is an HTTP-monitor. It performs the following tasks:
- Scan incoming and outgoing HTTP-traffic
- Intercept all HTTP-connections
- Filter Data
- Block loading infected pages automatically in any browser
- Scan archived files
- Protect from phishing and other dangerous online resources.
At the same time the firewall protects your PC or network from unauthorized access.
Thus, SpIDer Gate and the firewall must operate simultaneously on your computer to protect your system against viruses and network attacks.
Does SpIDer Gate depend on my browser?
No. SpIDer Gate operates independently of the programs that use the Internet (including browsers).
Does operation of SpIDer Gate slow down web surfing?
Dr.Web anti-virus engine is so fast that SpIDer Gate won’t delay loading of web-pages or slow-down file transfers.
How can I configure SpIDer Gate's verbose log?
For version 5.0:
- Increase log file size up to 5 Megabytes. Right-click on the Dr.Web icon in the notifications area, select SpIDer Gate–>Settings, in the next window proceed to the Log tab and modify the File size limit field value.
- Right-click on the Dr.Web icon in the notifications area and select SpIDer Gate ->Disable.
- Press Start–>Run, copy one of the strings below to the Run field and launch SpIDer Gate:
- "C:\Program Files\DrWeb\spidergate.exe" -dbg — enable verbose logging,
- "C:\Program Files\DrWeb\spidergate.exe" -dbg -dbg — debug logging.
Version 6.0
Right-click on the Dr.Web icon in the notifications area and select SpIDer Gate–>Settings from the list (if this item is unavailable, you should first switch to the Administrator mode). In the next window, open the Log section and use the slider to set the Extended mode. Press Ok to confirm the changes made.

Further, if required, you can reproduce the problem that must be analysed using the extended report. Please keep in mind that the Debug log is not always required because redundant information might complicate troubleshooting.
How can I disable the SpIDer Gate HTTP monitor?
It is not recommended to disable the SpIDer Gate HTTP monitor because nowadays a lot of malware is distributed via infected websites. There are many script viruses and exploits that can cause harm to the system before they are saved to your hard drive and, consequently, detected by the SpIDer Guard® file monitor.
If disabling HTTP monitor is still necessary, right-click on the Dr.Web icon and in the next menu, select SpIDer Gate –> Disable. When anti-virus self-protection screen appears, type digits from the picture into the string and click Disable SpIDer Gate.
How do I disable the HTTP-monitor SpIDer Gate?
Right-click on the Dr.Web icon in the system tray and select SpIDer Gate-> Disable in the context menu.
Caution! It is not recommended to disable the HTTP-monitor SpIDer Gate because nowadays a lot of malware is distributed via infected web sites. There are many script viruses and exploits that can harm the system before they are saved to your hard drive and, consequently, detected by the file monitor SpIDer Guard.
How do I update the HTTP-monitor SpIDer Gate?
Since SpIDer Gate utilizes the Dr.Web engine and databases, it is updated automatically along with other anti-virus modules.
How is SpIDer Gate updated?
As other modules of the program Dr.Web, SpIDer Gate features the same anti-virus engine and uses the same virus databases and therefore is updated along with other modules.
The SpIDer Gate icon is red. What shall I do?
The red icon indicates that SpIDer Gate is disabled. To activate it, right click on the Dr.Web icon in the notification area. In the menu, hover over the SpIDer Gate item and in the drop-down list select Enable.
If the icon remains red, you have two options:
- Application error – in this case you need to contact the Technical support service.
- Your license does not cover SpIDer Gate. In this case, it is recommended to remove the component: Go to Start-> Settings-> Control Panel-> Add and Remove Programs, find the Dr.Web anti-virus on the list, click Modify and follow the wizard's instructions to disable this component.
This script should be used to answer users’ questions.
One of SpIDer Gate’s tasks is to inform users that visiting some websites is dangerous or undesirable, for reasons that include the presence of “pirated” content. Dr.Web informs users about such websites because they are accompanied by malicious programs. Websites are included in the so-called Dr.Web “anti-piracy” database only on the basis of allegations made by content copyright holders. Each allegation is verified by Doctor Web’s lawyers before the decision is made to include the corresponding URL in the database. When users receive SpIDer Gate notifications concerning the undesirability of visiting pirated websites, they are getting objective, legally considered information about intellectual property infringement. Thus, Doctor Web helps users of its products:
- avoid becoming the victims of criminals, who for their own selfish ends use others’ works and trademarks, and the fruits of others’ intellectual labours, for illegal purposes;
- avoid potential criminal indictment for downloading, using, and further distributing pirated content;
- protect PCs against infections occurring as a result of downloading unlicensed content that is accompanied by malicious programs.
Users make their own decisions as to whether it is worth visiting the websites they have been notified about. The SpIDer Gate component can be enabled or disabled at their discretion.
What is the impact of SpIDer Gate on the web-surfing speed?
The unique Dr.Web anti-virus engine allows SpIDer Gate to scan traffic so quickly that you will never notice any delay when viewing web pages and downloading files from the Internet.
When I try to go to some sites, SpIDer Gate blocks them and displays the message "URL is known as a source of infection." How can I disable this feature?
If you believe that SpIDer Gate has mistakenly blocked a respected site, please let us know through the form on our website.
If you need to access a suspicious site, right click on the Dr.Web icon in the system tray and in the context menu select SpIDer Gate-> Settings. Clear the Block known source check box and press Ok.
Caution! Disabling this option is not recommended, because pages from all sites, including potentially dangerous ones will be loaded without a corresponding warning.
Where can I find SpIDer Gate's log?
SpIDer Gate's log file name is spidergate.log. The file is located in the C:\Documents and Settings\Your_user_name\DoctorWeb folder.
Which browsers support SpIDer Gate?
SpIDer Gate is compatible with all web-browsers.
Dr.Web anti-virus engine is so fast that SpIDer Gate won’t delay loading of web-pages or slow-down file transfers.
Why do I need the Speed balance option?
The Speed balance option allows you to adjust the amount of CPU time utilized to scan Internet traffic. The higher the scanning priority, the more CPU resources it will use, but it will help maintain high speed connectivity. Low priority results in low CPU load and slower network communication speed. Changing the default value usually is not required.
Parental control
A site I want to visit is blocked by the parental control module. How do I exclude this site from the blocking list?
Add the site's address onto the white list, or if you are sure that the site is blocked by mistake, report the false positive to Doctor Web.
At what address can I report false positives of the Dr.Web Parental control?
Send links to web-site mistakenly rated by the module as undesirable to Doctor Web's laboratory via the web-form on our website.
How can I disable the parental control module?
Right-click on the Dr.Web icon in the notification area and select Parental Control → Settings. Enter the password and select Allow access to all sites. In the Local Access tab, select Allow and Unlimited in the corresponding sections. Click Apply to save the changes.
Caution! Disabling Parental control will allow access to all resources on the Internet, LAN and the PC.
How can I recover a lost password to access the Parental control?
There is no way to recover a Parental control access password. The only solution is to import a new password into the registry from a special file.
- Use the download link to obtain the file
- Disable the anti-virus's self-protection
- Double-click on the downloaded file and agree to modify the registry
- Enable self-protection
- Now your password is "drweb" (without the quotes), do not forget to change it in the Parental control settings.
How do I disable access blocking?
Right-click on the Dr.Web icon in the notification area and select Parental Control → Settings. If this is the first launch of the Parental control module, you will need to set a password for it. Then in the subsequent window select what you want to block and then click Apply.
I am prompted to enter a password to access the parental control. What for?
If the password for parental control is not specified, each time you open parental control settings, you will be prompted to set a password. It is Recommended that you set a password right away to prevent unauthorized access to these settings. If no password is required, click Cancel.
I can not turn on the Parental control, it requires a key file. What do I do?
If upon activating the Parental control you receive the message "Unable to find a key file", it means that your license does not cover the Parental control. In this case, it is recommended to remove the component: Go to Start–> Settings–> Control Panel–> Add and Remove Programs, find the Dr.Web anti-virus on the list, click Modify and follow the wizard's instructions to disable this component.
What is the "Local access" option for?
Use the local access settings to restrict access to resources on your computer - files and folders. In addition, it is possible to prohibit the use of removable storage media and access to the LAN. By restricting access to such resources you can avoid damaging or removing sensitive data by a third party and prevent unauthorized access to confidential information.
What is the parental control for?
The Parental control module allows you to restrict users' access to certain sites on the Internet, local files and folders, local network resources. An administrator can manually configure a list of banned sites or take advantage of the constantly updated thematic lists provided by Doctor Web.
When I hover the cursor over the Dr.Web icon in the notification area, the tooltip says that local access protection and URL filtering are disabled. What does this mean and is it dangerous?
Local access protection and the URL filter are parental control features disabled by default. You need to activate them manually by setting the parental control operation mode and access password in its settings.
Which sites can be blocked with the Parental control module?
The Parental control module can restrict acces to any specific sites or web-pages, as well as to all known sites containing information on certain subjects (such as sites about drugs or weapons, sites of paid on-line games, etc.). A list of specific websites to be blocked is set up by the user; both individual addresses and keywords found in URLs can be specified in this block list. Blocking websites by subject is carried out automatically using the lists, updated regularly by Doctor Web.
Will my child be able to disable the Parental control module without my consent?
If you set a password for accessing the Parental Control, only the computer's administrator will be able to do so after entering the password. If no password is set, then any user with administrative privileges will be able to change the settings.
Updating the anti-virus and virus databases
How much does an expanding virus database impede the anti-virus’s search for malicious objects?
Virus databases do indeed get larger with each update. But Dr.Web solutions use the most cutting-edge anti-virus database format so that as the virus databases get bigger, scan speed is not reduced.
Moreover, because the latest technologies are applied to Dr.Web solutions, the size of the virus databases can be reduced. This is because they exclude entries containing information about malicious programs that are automatically detected with the help of the newest technologies.
How often do Dr.Web anti-virus programs require a reboot?
Doctor Web strives to release Dr.Web component updates, especially critical ones, as quickly as possible. After all, the reliability of the protection directly depends on the anti-virus’s ability to intercept and cure the latest threats and still operate error free. Experience shows that for each individual product, updates that require a reboot are being released no more than once or twice a month, the only exception to this being recently released program versions and those under active development.
I can’t update Dr.Web; I’m getting an update error message. What should I do?
First do the following:
- Make sure that your computer is connected to the Internet.
- If you are using a firewall, go into its settings and allow the drwupsrv.exe update module, located in the folder containing the installed Dr.Web software, to access the Internet.
- If you access the Internet through a proxy server that requires authentication with a username and password, go to the settings and specify the proxy server’s address and port, and the username and password for it. To do this, right-click on the Dr.Web icon in the notification area, and select Tools –> Settings. In the next window, go to the Proxy server tab and configure the proxy server settings.
If after trying the above, you are still experiencing difficulties, please contact the Doctor Web technical support service and describe in detail how your computer connects to the Internet (note: if a proxy server is involved, please specify whether authentication is required, and whether your browser or Dr.Web update module is configured to be used via the proxy server).
Is there some utility that can update the anti-virus automatically, and how can I set this up?
When an Internet connection is present, the anti-virus updates every 30 minutes by default (this is the most optimal setting).
When required, you can change this setting by doing the following: right-click on the Dr.Web icon located in the bottom-right corner of the system tray. Then, in the context menu, select Tools → Settings and go to the Updating tab.
Alternatively, you can update the anti-virus manually by right-clicking on the Dr.Web icon in the bottom-right corner of the system tray, and then selecting Updating in the context menu.
I’ve heard that when I buy the Dr.Web anti-virus, I’m only paying for a copy of the software program, and that I will have to pay over and over again for anti-virus database and module updates. Is that true?
No, that’s not true. When you buy the anti-virus, you are paying not only for the program itself, but also for the right to get anti-virus database and module updates as well as the opportunity to contact the technical support service while your license is valid. Nobody will ever come after you for additional money! Proof of this can be found in the Dr.Web license agreement which you are invited to read before you install the anti-virus. Doctor Web assumes a number of obligations and guarantees the following:
‘Throughout the entire software usage period, the User is granted the right to receive through the Internet virus database updates as well as upgrades of the software modules as they are made available by the Rights Holder’.
The Dr.Web license agreement is a legal document that guarantees your rights as a consumer.
What should I do if an anti-virus update requires a reboot but I can’t do it right now?
In the window that notifies users that a reboot is required, you can choose when you want the system rebooted. You can choose to do it now or postpone it until a time convenient for you.

What’s the difference between updating the anti-virus components and updating the virus databases?
Both are aimed at keeping the anti-virus current to protect a computer against any and all threats, including the latest ones. The difference is that when only the virus databases are updated, you don’t need to reboot the system, but when the anti-virus components are updated, rebooting may often be necessary. We strongly recommend that you act on Dr.Web reboot notifications related to component updates because out-of-sequence updating may lead to a weakening of protection.
Why are there fewer entries in the Dr.Web virus database than in the databases of some other anti-virus programs?
Just one Dr.Web database entry can lead to the detection of tens, or hundreds, or sometimes even thousands of similar viruses.
Moreover, the presence of Origins Tracing™ and structural entropy analysis in the Dr.Web anti-virus makes it possible to detect malicious programs that are so new they have yet to undergo analysis in the Doctor Web anti-virus laboratory.
The smaller number of virus entries (compared to some other anti-virus programs) even makes it possible to detect unknown viruses (i.e., those not in the virus database) with a high degree of certainty. These are viruses that will be created on the basis of existing viruses.
How do users benefit from the small size of the virus database and the fewer number of entries in it?
- Hard drive space is conserved
- RAM is conserved
- Less Internet traffic is used when updates are downloaded
- The virus database can be downloaded at high speed, and it can operate quickly when analysing viruses
- Future viruses, those that will be created in the future by modifying existing viruses, can be detected
Thus, the fundamental difference between the Dr.Web virus databases and the virus databases of other anti-virus programs is that with its fewer number of database entries, the Dr.Web database allows as many (or even more) viruses and malicious programs to be detected.
Why do you recommend updating the anti-virus EVERY TIME the computer is connected to the Internet?
Hundreds of thousands of new viruses appear DAILY — and correspondingly, tens of thousands appear every hour. The overwhelming majority of them are modifications—brothers and sisters of existing viruses. Yes, the Dr.Web heuristic analyser and the Dr.Web behavioural analyser really do make it possible to detect with a high degree of probability that a file has been infected or is a Trojan itself. But “probably infected” does not mean “infected for sure”! This file will be declared a virus only after its virus signature has been added to the Dr.Web virus database.
But no anti-virus software vendor will ever guarantee you that today won’t be the day that somebody writes a brand new virus that can’t be detected by even the most perfect heuristic analyser.
As a rule, malicious programs reach their victims at the same time they reach the Doctor Web anti-virus laboratory for analysis, and in the case of the newest malicious programs (those not yet detected by any available mechanism), anti-virus analysts need time to develop and test a “cure”. Frequent updating makes it possible to minimise the time it takes for potential victims of criminal attacks to get hold of updates. Often ‘cures’ for malicious files are available, but have not yet been downloaded.
Unlike its competitors, Doctor Web’s principled position is to release updates as frequently as possible so as to minimise the time period during which new threats can pose a danger.
That is why the anti-virus databases need to be updated every time the computer is connected to the Internet or as frequently as possible if the connection is continuous.
Why does Dr.Web ask users to reboot when updating components?
Rebooting is needed so that the updated Dr.Web drivers work properly with the operating system. Our competitors’ anti-virus solutions are updated in the same manner.
Dr.Web for Windows. Scanner
How can I enable a scheduled scan?
In order to launch full scan, please use the Task scheduler.
Windows XP:Open the Windows task scheduler (Start->Control panel->Assigned tasks). Find the Dr.Web Daily Scan task pre-installed during installation and open it to edit. In the Task tab, check Enabled. In the Schedule tab, specify scan frequency and time you need. Press Ok to apply the settings. Enter user name and password upon the operating system request.
Windows Vista/7:In order to edit a task pre-installed during the anti-virus installation, right-click on the Dr.Web icon in the notifications area and select Tools->Scheduler. In the next window, select the Drweb Daily Scan task, which is disabled by default. You should enable it (by right-clicking the task and selecting Enable option). In the Triggers tab, edit launch time and frequency.
I have installed anti-virus on my PC and run the program. Though I did nothing about it, it started to perform itself — some numbers appeared and the progress bar began sliding to the right in the bottom part of the program window. What is it doing?
Quick scan of the critical system objects with the anti-virus scanner is launched automatically as the program starts. It is required to find out if any viruses exist in the system. After the scan is complete, two right windows indicate numbers. The left one shows the number of viruses found on your PC, while the right one — the number of RAM objects and files scanned with the anti-virus scanner.
In the scanner settings, there is an action to process infected and incurable files — Move. Are such files moved to a location on my PC?
The Move action in respect to infected and incurable objects means the following: an object is moved to a special directory specified in the Move to field (by default, it is the infected.!!! subdirectory of the Dr.Web installation directory) and accessible even after the scan is over. Furthermore, after having been moved, the file loses its extension. Such actions mean that the virus is actually “disarmed”, rendered incapable and, therefore, absolutely safe.
What is the scanner designed for? Is SpIDer Guard anti-virus monitor, which always monitors all the calls to files, not enough?
Dr.Web scanner for Windows either scans files at the user’s command or on the schedule specified in the Scheduler. Not all the files are checked, but only those specified in the scanner settings instead. By default, files are checked by format — i.e., files in archives, packed and e-mail files, and RAM and all the autorun objects as well. You may choose to scan disks, folders, scan by file types, by preset mask, or scan all the files. To view current scanner settings, go to the program main window menu bar and select Settings–>Modify settings.
Dr.Web anti-spam
How can spam be filtered into definite mail folder?
To move automatically all messages marked as spam by Dr.Web Anti-spam into definite mail folder in your mail client, do the following.
- In SpIDer Mail menu on the Windows Task Panel choose “Settings” – the SpIDer Mail “Settings” window will appear. Press the “Advanced…” button. The “SpIDer Mail® Spam Settings” window will open. Check the “Add prefix to the subjects of the spam messages” box. Input any word or combination of symbols in the field below it. This will be the prefix Dr.Web Anti-spam will add to subjects of messages marked as spam.
- In the mail client you use, make a new folder for spam. Make the rule for this folder so that all the spam messages with the prefix you specified in the “Add prefix to the subjects of the spam messages” filed are placed there automatically.
How to activate Dr.Web spam filter?
Incoming mail filtering is processed by SpIDer Mail, one of Dr.Web modules. The following steps describe how to activate the spam filter:
- In SpIDer Mail menu on the Windows Task Panel choose “Settings” – the SpIDer Mail “Settings” window will appear.
- In the “Scan” pane of the SpIDer Mail “Settings” window enable the “Check for the spam” checkbox and press OK to save the changes made; then close SpIDer Mail “Settings” window.
After you’ve activated your spam filter, SpIDer Mail with Vade Retro anti-spam engine integrated into it starts filtering all your incoming mail on POP3 and IMAP4 protocols.
How to avoid filtering Cyrillic e-mails as spam?
At first all spam messages were of Latin origin and spam-filters’ developers, represented for the most part by Western companies, were aimed at filtering these ones only. Later on spammers switched into Cyrillic, too. But since the bulk of spam is still in Latin, there are some difficulties to filter Cyrillic spam.
To save your Cyrillic correspondence from being filtered as spam without a prior analysis, check the “Allow Cyrillic texts” box. Otherwise such e-mails are likely to be marked as spam. “Allow Chinese, Japanese, Korean text” option works the same way.
How to configure spam filtering to a specific folder in my e-mail client?
To have all the messages marked with Dr.Web spam filter automatically moved to a specific folder — let's call it Spam, for example, — follow the below steps:
- Right-click on the Dr.Web icon in the notifications area and select SpIDer Mail–>Settings. Go to the Anti-spam tab, and check the box next to Add a prefix to the Subject field of e-mails containing spam. In the field below, enter any word or letter combination you like — that's what will be a prefix Dr.Web spam filter will add to the subjects of messages specified to be a spam.
- In your e-mail client, create a folder for spam filtering and configure rule for it so that messages having a prefix you have entered to the Add a prefix to the Subject field of e-mails containing spam be placed into it automatically.
Below are detailed steps on how to set up rules for various e-mail clients. It is assumed that the Anti-spam is configured to mark an incoming spam with the [SPAM] prefix. If you chose an alternative prefix, use it in accordance with this manual...
Microsoft Outlook Express 6
- Create a new folder into which spam will be moved:
- right-click on the account name, and in the context menu select "New Folder...";
- enter the Spam folder name, and click "OK".
- Set a filter rule for messages marked as spam:
- in the menu, select "Tools" - "Rules for messages" - "Mail ...";
- in the first list, check the "Search for messages containing specific words in the "Subject" field;
- in the second list, check the "Move to a specified folder";
- in the "Rule description", click on the "containing specific words";
- enter the [SPAM] key word, and press "Add", then "OK";
- in the "Rule description", click on the "specified";
- select the "Spam" folder created in step 1, and press "OK";
- in the "Rule name", type "Spam filtering", and press "OK" twice.
Microsoft Office Outlook 2003:
- Create a new folder into which spam will be moved:
- right-click on the account name, and in the context menu select "New Folder...";
- enter the Spam folder name, and click "OK".
- Set a filter rule for messages marked as spam:
- in the menu, select "Service" - "Rules and alerts...";
- Go to the "E-mail rules" tab;
- click on "New...";
- select "Create a new rule";
- in Step 1, select the "Check messages upon receipt", then click "Next";
- in Step 1, select "containing
in the "Subject" field; - in Step 2, click on "
"; - in the upper field, enter [SPAM], and press "Add", then "OK" and "Next";
- in Step 1, select "move them to the
folder"; - in Step 2, click on "
"; - select the "Spam" folder created in step 1, and press "OK", then "Next" twice;
- in Step 1, specify the "Spam Filtering" rule name, and click "Finish", then "OK".
Microsoft Office Outlook 2007:
- Create a new folder into which spam will be moved:
- right-click on the account name, and in the context menu select "New Folder...";
- enter the "Spam" folder name, then in the "Folder content" list, select "elements such as Mail"; in the "Place folder into..." tree, choose a location where the "Spam" folder will be stored.
- Set a filter rule for messages marked as spam:
- in the menu, select "Service" - "Rules and alerts...";
- Go to the "E-mail rules" tab;
- click on "New...";
- select "Move all messages containing specific words in the subject field to folder", and click "Next";
- in Step 1, select "containing
in the "Subject" field"; - in Step 2, click on "
"; - in the upper field, enter [SPAM], and press "Add", then "OK" and "Next";
- in Step 1, select "move them to the
folder"; - in Step 2, click on "
"; - select the "Spam" folder created in step 1, and press "OK", then "Next" twice;
- in Step 1, specify the "Spam Filtering" rule name, and click "Finish", then "OK".
Windows Mail 6 (Windows Vista):
- Create a new folder into which spam will be moved:
- right-click on the account name, and in the context menu select "New Folder...";
- enter the "Spam" folder name; in the "Select the folder in which a new folder will be created" tree, select a location where the "Spam" folder wil be stored.
- Set a filter rule for messages marked as spam:
- in the menu, select "Service" - "Message rules " - "Mail...";
- click on "New...";
- in the "1. Select conditions for this rule" list , flag the "Search for messages containing specific words in the "Subject" field";
- in the "2. Select actions for this rule" list, flag the "Move to the specified folder";
- in the "3. Rule Description" field, click on "containing specific words";
- in the "Enter the keywords" dialog box, type [SPAM] in the "Enter keywords or sentence and click" Add"" field, press "Add", then "OK";
- in the "3. Rule Description" field, click on "specified";
- in the next "Move" window, select the "Spam" folder created in step 1, and press "OK";
- in the "4. Rule name" field, type "Spam Filtering" and click "OK" twice.
Ritlabs The Bat! 4
- Create a new folder into which spam will be moved:
- right-click on the account name, and in the context menu select "New" - "New Folder...";
- enter the Spam folder name, and click "OK".
- Set a filter rule for messages marked by anti-spam as spam:
- right-click on the account name, and in the context menu select "Inbox Assistant settings...";
- right-click on the "Incoming mail", and in the context menu, select "New rule";
- in the "Name" field, enter "Spam filter";
- click on "Sender" and choose the "Subject" line from the drop-down list;
- enter [SPAM] into the field after the word "containing"
- under the "Actions" list, click "Add";
- in the drop-down list, select the "Move message to folder";
- in the folder tree, select the "Spam" folder created in step 1, and click "OK" twice.
Mozilla Thunderbird 2.0
- Create a new folder into which spam will be moved:
- right-click on the account name, and in the context menu select "New Folder...";
- enter the Spam folder name, and click "OK".
- Set a filter rule for messages marked by anti-spam as spam:
- select the account name in the tree of accounts and folders;
- in the menu, select "Tools" - "Message Filters...";
- press "Create...";
- in the "Filter name" field, enter "Spam filter";
- in the list below, sequentially select "Subject", then "contains" from the drop-down lists; in the right-hand field, enter [SPAM];
- from the drop-down lists in the list far below, sequentially select "Move message to...", and in the next box, select the "Spam" folder created in step 1, then press "OK";
- close the "Message filters" window.
How to manage Whitelists\Blacklists?
Whitelists and Blacklists contain mail addresses you either trust or not.
- If the sender’s e-mail address is added to the Whitelist, these messages are not filtered. However, if the sender and the receiver share the same domain name e-mail addresses and this domain name is enlisted in the Whitelist with the “*” symbol, it is filtered for spam.
- All messages enlisted in Blacklist are marked as spam without additional analysis.
Both lists settings should be fill in one after another, parted by “;”. The “*” sign can be used as a part of e-mail address. For example, *@domain.org passes for all addresses with “domain.org” domain name.
Where to forward e-mails falsely marked as spam/non-spam?
In case some messages are falsely filtered, they should be forwarded as attachments to special addresses for analysis and correction of spam-filtering techniques.
- Messages, falsely marked as spam , should be forwarded as attachments to nonspam@drweb.com
- Messages, falsely marked as non-spam , should be forwarded as attachments to spam@drweb.com.
Which messages are filtered by Dr.Web anti-spam as unwanted?
- To make it short, let’s apply “spam” name to all unsolicited e-mails. The bulk of it comprises advertisements offering different goods and services.
- The most dangerous among spam messages are phishing, pharming and scamming ones. Nigerian scams, lottery and casino scams, fraudulent messages from banks and credit organizations are characteristic of them.
- Next come black political and economic PR scams and the so-called “letters of happiness”.
- There is also a technical spam, or bounce messages, generated by mail servers in reply to undelivered message, whether you did send one or not. Such e-mails might emerge as a result of mail server poor work or virus activity, of some e-mail worm, for instance.
Dr.Web Firewall
Do I need to disable Windows Firewall when installing Dr.Web Firewall?
If you install a Dr.Web package that includes the firewall, you will be prompted to deactivate the Windows firewall. The Windows firewall must be disabled, doing otherwise will result in numerous conflicts that can cause errors or an OS crash.
Neither it is recommended to enable the Windows firewall while the Dr.Web firewall is working.
How can I create an application (program) rule in Dr.Web version 8 and earlier?
Right-click on the Dr.Web icon in the notification area. In the menu, hover over the Firewall item and in the drop-down list, select Settings. Click the Application tab.
To create an application rule, click Create. In the opened window, specify the path to the executable file for the program for which you are creating the rule, and select
- the rule type for launching network applications:
- Allow — to allow the application to launch processes.
- Block — to block the application from launching processes.
- Not configured — to customize the selected firewall operating mode for this application.
- and the rule type for accessing network resources:
- Allow all — the application will be permitted to access the network.
- Block all — the application will be blocked from accessing the network.
- Custom — access will be determined by the parameters specified.
- Not configured — to customize the selected firewall operating mode for this application.
You do not need to configure rules manually if the firewall is operating in the training mode — it is easier to configure access for each application right from the firewall notification window when it attempts to connect to the network for the first time.
How do I disable the automatic launch of the firewall at Windows startup?
You can't disable automatic startup for the firewall with standard tools available in the system.. However, you can disable temporarily various anti-virus modules including the firewall at any moment. Right click on the Dr.Web icon in the system tray and select Firewall-> Disable in the context menu.
Note: If the Disable item is not available in the menu, switch to the Administrative mode.
I'm getting messages about new network rules created again and again. How can I disable the notifications?
Dr.Web Firewall in the real time mode creates rules for applications running in the system but are not on its list. Therefore, you must create rules for such applications when they attempt to connect to the network for the first time. A connection request is issued for specific ports and protocols utilized by the application. You can allow all the requested connections, a connection only for a specific protocol and port, or block the connection. Once the rule is created, the firewall handles requests according to the rule and no longer gives out messages regarding application's network activity to the user.
The predefined database contains rules for the most popular programs, as well as all Windows system services and applications. The database is updated on a regular basis.
For more information see the video tutorial on configuring the Dr.Web firewall.
What firewall operational modes are available?
Dr.Web Firewall has four operating modes:
- Allow unknown connections — all unknown connections are allowed. Protection is not active.
- Training mode (create rules for known applications automatically) — learning mode. Rules for known applications are created automatically. The user will be prompted to choose what action to take with all unknown connections.
- Interactive mode — learning mode. When the operating system or an application attempts to connect to a network, the firewall will prompt the user to choose an action.
- Block unknown connections — all unknown connections will be blocked without prompting the user.
Dr.Web for Windows. SpIDer Guard
Can I temporarily disable SpIDer Guard with no need to reboot my PC?
Yes, you can. In order to disable SpIDer Guard, right-click on the Dr.Web icon in the notifications area and select SpIDer Guard–>Disable.
How can I add an exclusion for the SpIDer Guard scan?
In order to exclude a program or file from the SpIDer Guard scan, right-click on the Dr.Web icon in the notifications area and select SpIDer Guard–>Settings. In the next window, proceed to the Exclusions tab, press the Browse button to select the folder where the program to be excluded from the scan is installed, and press Add.
Should it become necessary to exclude a folder or file while the Dr.Web for Windows Scanner is running — select Settings–>Modify settings in the scanner menu. You may add a folder in the Scan–>Excluded paths list tab, and a certain file in the Excluded files list, then you need to press Add.
What are the SpIDer Guard functions?
Anti-virus guard is loaded into RAM and checks files being created or modified on the hard disk and all the files being opened on network disks and removable media “on the fly”.
Besides, SpIDer Guard constantly traces running processes activities specific to viruses and blocks those processes upon their detection.
Upon detection of infected objects, SpIDer Guard interacts with them according to the specified settings.
What does “Optimal mode” mean?
In the Optimal mode the guard scans only files being launched, created and modified on hard disks, removable media and network disks.
What does “Paranoid mode” mean?
Paranoid mode is an enhanced protection mode. When this mode is activated, the guard starts scanning all the files being opened, created or modified on hard disks, removable media and network disks.
What is Prohibit Host system file modification option used for?
Enabling this option allows to block attempts to modify HOSTS system file used by operating system to make an Internet access easier. Modifications of this file may be resulted in virus or any other malicious program activities, and this may cause loss of access to some websites or network resources as a whole.
What is the function of the Block removable media autorun option?
Enabling this option allows to block automatic launch of autorun.exe-like files from removable media and hard disk drives. This option is used to neutralize autorun-viruses, which are automatically activated when a device is connected to the PC with autorun option enabled.
Where is SpIDer Guard log located?
SpIDer Guard log file is called spiderg3.log and located in the anti-virus installation folder (by default, it is C:\Program Files\DrWeb).
Dr.Web for Windows. SpIDer Mail
How can I test SpIDer Mail performance?
You can test proper operability of anti-virus programs detecting viruses by their signatures with the use of EICAR (European Institute for Computer Anti-Virus Research) file.
This program is specially designed to allow you to see how the installed anti-virus will alert you to the viruses it detected, with no need to expose your PC to danger. Eicar program is not malicious but is specially tuned so that most anti-viruses treat it as a virus. Dr.Web refers to this “virus” as EICAR Test File (Not a Virus!).
To test mail anti-virus performance, you can ask a friend of yours to send you this file, or otherwise try to send it to yourself. If SpIDer Mail detects a virus — that is OK.
Which addresses shall I use to send letters to if misrecognized as a spam / not spam?
If the spam filter misrecognizes some letters, they can be forwarded to special mail addresses for analysis and improving filter performance quality:
- Send letters misrecognized as a spam to nonspam@drweb.com.
- Send letters not recognized by mistake as a spam to spam@drweb.com.
Important! You should forward messages as attachment, not as inline.
Dr.Web for Android
Are there dangerous malignant programs for Android?
Yes, there are and their number is growing. Android.SmsSend Trojan horses that emerged as early as in 2010 are the most common threats to the OS. They are designed to send SMS messages at premium numbers and sign up subscribers to various services.
Mobile banking Trojans are designed to intercept SMS messages, steal mTAN-codes and pass them to criminals who perform various financial transactions with accounts of unsuspecting victims (for example, make online purchases) pose an extreme danger. Android.SpyEye.1 is a banking Trojan for Android OS.
Such malware as Android.MailSteal.1.origin, Android.Maxbet.1.origin, Android.Loozfon.origin and Android.EmailSpy.origin. steal e-mail addresses from devices' address books and send them to a remote server, so that attackers can carry out spam mailings.
Are there viruses for mobile devices?
Malignant applications for mobile OSs are the fastest growing malware segment. As popularity of an OS is growing among users, so does the interest in it on the part of intruders, whose main goal is to get money. The number of threats to Android increases most rapidly.
Can I use the anti-virus to bar calls at certain numbers from my mobile device?
Dr.Web for Android doesn't block outgoing calls.
Does the anti-virus affect performance of my device?
Dr.Web anti-virus occupies about 1 MB in the device memory. Only the file monitor that keeps track of the system processes resides in the memory at all times. The monitor requires a certain amount of resources, but it has no noticeable effect on overall performance.
How can I access Dr.Web for Android settings menu?
Start Dr.Web for Android and tap the Menu button on your mobile device. In the pop-up window select Settings.
How can I check if the anti-virus is running?
Start Dr.Web for Android. In the subsequent window go to the SpIDer Guard section and check if the Monitor is enabled and protects the system message is displayed. If it is, the anti-virus protects your device. If the message is Monitor disabled, the monitor is not running. Tap the monitor indicator button.
How can I disable the anti-virus temporarily?
How can I enable the Russian interface language?
Dr.Web for Android interface language corresponds to the current language of the operating system. Select Russian as the Android interface language and the anti-virus will switch to Russian automatically.
Note: to change the OS language tap Menu and point to Settings in the subsequent pop-up window. Go to Language & Keyboard, Select Language and choose the language you need in the succeeding window.
How can I get a demo key file?
Dr.Web for Android is available free of charge and requires no registration. To use it, just download the distribution. Read more: https://news.drweb.com/show/?i=1261&lng=en&c=5.
How can I install the anti-virus?
There are three ways to install the anti-virus:
- Use HTC Sync. To install Dr.Web, you need to connect your device to your computer and sync them with HTC Sync. Use HTC Sync to run the Application Installation wizard, specify the path to the file drweb-600-android.apk and follow the wizard instructions.
- Manually. Copy drweb-600-android.apk (download link) to the mobile device (from a computer, with a memory card or download OTA from our web-site). To run the file you will need a file manager.
- Via Android Market. Go to the Android Market, find Dr.Web on the application list and select Install. In the subsequent window displaying information about the privileges required for the program, click OK, the application will be installed automatically.
How can I restore a file to its original location after it has been quarantined by the anti-virus?
Launch Dr.Web for Android and select Quarantine. Tap the file you want to restore. In the succeeding window you will see all the information about this file and malicious code contained in tt. Tap the Restore button - the file will be moved to the original folder.
How can I scan the device for viruses?
To scan your mobile device for viruses, launch Dr.Web for Android, and tap Scanner. In the next window, specify the scan mode.
- Quick scan. The anti-virus scans only files of installed applications. The fewer there are applications, the sooner the express scan will be completed.
- Full scan. All files on your mobile device are scanned.
- Custom scan. Scan only certain files or folders for viruses. To run a custom scan, select objects you want to scan and tap the Scan button.
Abort scan at any time by tapping Abort.
How can I send a quarantined suspicious file to Doctor Web?
To send a suspect file, use the form on our website: https://vms.drweb.com/sendvirus/. To attach a file to your request, tap Browse, select the file you need and press Open. To send the request, tap the Send button.
How can I send a scanning report to Doctor Web?
Launch Dr.Web for Android and select Statistics. Tap Menu and choose Save log on SD card. The DrWeb_Log.txt file will be saved into the /Andoroid/data/com.drweb/files/ directory and a corresponding notification will be displayed. If you want to send a support request, use the web-form at https://support.drweb.com/support_wizard/. To attach a file to your request, tap Browse, select the file you need and press Open. To send the request, tap the Send button.
How can I update databases after I have downloaded an up-to-date version from your website?
Presently you can't update the anti-virus by copying virus databases onto a mobile device. To update the databases, use the built-in update module.
Note: an Internet connection is required for updating.
How can I update virus definitions?
Start Dr.Web for Android. Then tap the Update button - all the necessary files will be automatically downloaded and installed. For a successful update, your mobile device must have access to the Internet.
Note. You can also enable automatic daily updating. To enable daily updating, tap the Menu button, then tap Settings. In the Update section tick the Automatic check-box.
How can I view a scanning report?
Launch Dr.Web for Android and select Statistics. The statistics window displays the number of processed files and information about all actions performed by the anti-virus components. It is possible to reset the statistics (Menu→Clear statistics), or save the log to a file (Menu→Save log).
How can I view anti-virus statistics?
Launch Dr.Web for Android and select Statistics. The statistics window displays the number of processed files and information about all actions performed by the anti-virus components. It is possible to reset the statistics (Menu→Clear statistics), or save the log to a file (Menu→Save log).
How do I activate and configure the anti-theft in Dr.Web for Android?
In the application's main menu, select Anti-theft. In the Configuration Wizard window, enter and confirm a password. If necessary, create a friends list (a list of trusted numbers).
More detailed information about configuring the anti-theft can be found in the corresponding section of the documentation.
Then you can adjust anti-theft security parameters: set blocking conditions and the actions that the program will perform if those conditions are met. More information about this can be found here.
To activate the anti-theft, use the previously specified password.
How do I uninstall the anti-virus?
Go to the Settings menu of the device, select Applications→Manage applications. In the Third-party tab tap Dr.Web for Android. In the subsequent application information window tap Remove. To permanently delete the anti-virus, tap OK in the removal confirmation dialogue.
I have forgotten the anti-theft password. How can I unlock my phone?
There are three ways to choose from to unlock the device depending on the version of Dr.Web for Android you use and availability of the friends list.
- If you are using Dr.Web for Android 7.0 and higher, use the special service at.
- If, when configuring the anti-theft (any version), you created a list of friends, you can disable the anti-theft by sending a corresponding SMS command from a trusted number. For more information about SMS commands, please follow this link.
- If you use Dr.Web for Android 6.0 and didn't create a list of friends, you need to send a request to Doctor Web's Technical Support Service. In your request, you will need to provide the following information:
- Your Dr.Web serial number
- a photo of the box, warranty card, or other document that concerns the blocked device and contains a readable IMEI.
I never install malware! How can my handheld get infected?
You don't need to install anything — just visit a compromised web-site. And it won't necessarily be a site with objectionable content — from intruders' point of view, hacking news portals is much more useful. News sites are the most visited ones on the Internet. They usually do not cause any suspicion among users or system administrators from companies which do not block access to such sites. That's why news portals are a very attractive field of operation to intruders. By Spreading malware through such sites, they can cause damage to a huge number of users and companies.
There is a virus warning. What shall I do?
Tap on the Dr.Web icon on the notification panel. In the succeeding window you will see all the available information about the threat. Tap on this message, then select the desired action: delete the file, place it into the quarantine, or ignore the warning.
Warning! It is not recommended to choose the Ignore option! If you believe that the anti-virus has made a mistake, select Quarantine and after that send the file to Doctor Web for a detailed analysis.
What are the SpIDer Guard functions?
SpIDer Guard is designed to constantly protect mobile devices against viruses and other threats. It loads into the memory upon Android start-up and scans all files accessed by a user or the system in real time.
What does Dr.Web for Android protect from?
Dr.Web for Android protects from viruses and other malicious programs that may steal or damage information stored on the mobile device. It prevents viruses from getting and running on a mobile device.
Note: Dr.Web for Android can only protect mobile devices and its virus databases are different from those used by the anti-virus maintaining security of desktops and laptops. To protect a computer, use corresponding products from Doctor Web.
What is the quarantine for?
The anti-virus places suspicious and infected files into the quarantine folder. Suspicious files are quarantined to be sent to Doctor Web's virus laboratory for analysis, infected ones are isolated if curing is not possible for some reason.
Where is the update log stored?
Information about the number of virus definitions in the databases and date of the last update is contained in the anti-virus statistics.
Why is it necessary to protect employees' personal mobile devices as well as their corporate computers, especially if the employees work with finance (e.g, accountants)?
While out of the office, employees are not protected from hackers, applications they use may have vulnerabilities, their computers and mobile devices can be infected with viruses and Trojans that steal banking and payment system access passwords and money from bank accounts.
Employees regularly connect to the company's network via their device, and thus put confidential data and money at risk—not only their personal assets but corporate too. Incidents when malware gets onto a local network from personal devices, including handhelds, account for up to 70% of intrusions.
In addition, banks often send SMS confirmations to maintain security of transactions. There are malignant programs that can modify such confirmation messages. An anti-virus guarantees that incidents when money is stolen from accounts will never be concealed.
For purchase through Google
How can I create a technical support request on My Dr.Web Portal?
- To enter the portal from a mobile device, install Dr.Web. In the application menu, select About and tap My Dr.Web.
Go to the Support tab → Ask a question.
- If you want to go to My Dr.Web Portal from a PC or Mac, use the special service on the Doctor Web site. Log on to the portal and go to the Support tab → Ask a question.
Use My Dr.Web Portal — your personal assistant and guide to services. Here, in particular, you can contact our technical support. The history of your requests is also available here.
How can I find out whether I'm using the commercial version or the free one?
Select About in the Dr.Web menu. If the word Light is present, you are using the free version. Also, the main menu provides access to different sets of security components; the paid version has substantially more components.
| Dr.Web for Android Light — free license | Dr.Web for Android — commercial license |
|---|---|
 |
 |
How can I get refunded for a license I have paid for?
- If you have a payment receipt email from Google Play, open it and click on the link in the phrase "Have a question? Contact the seller Doctor Web, Ltd.". A Google Play support request form will be loaded. On the request page, select the option "I'd like to request a refund/return the item" and send the refund request. A Doctor Web employee will process your request, and you will get a refund.
- If the purchase receipt is lost request a refund through the support request form at Doctor Web's site or in My Dr.Web Portal. Specify your order number and Gmail address.
In both cases, you will receive a refund confirmation from Google Play.
Important! The time frame for a refund depends only on how fast your bank processes such requests! If the money is not returned to your account within 2-3 days of receiving a confirmation from Google Play, contact your bank. Doctor Web cannot influence bank policies or expedite refunds. Our refund liabilities to our users are met after you receive a refund confirmation from Google Play.
How can I reinstall Dr.Web for Android?
- If Dr.Web is not already installed on your device, use the account under which you purchased the license to log in at Google Play. In My Apps, select Dr.Web and tap Install. A valid license will be recognized automatically.
- If Dr.Web is already installed on your device:
- Run Dr.Web.
- In the main Dr.Web window, select About.
- Tap Update License and select Purchase/Download.
How can a user who has the free version of Dr.Web for Android get technical support from Doctor Web?
- If you need help buying a commercial version, on the support request page of Doctor Web's site, select I do not yet have a commercial Dr.Web license and ask your question.
- If you need assistance solving a technical problem, this kind of support is not provided with the free version of this product. Try to find the answers to your questions in the FAQ or get advice from other users on the Dr.Web forum.
I paid for my license but the program indicates that I'm using a demo version / the license hasn't been found.
In the program's main window, go to the menu, select About, tap Update License and choose Purchase/Download. To activate the license, you must have Internet access and use the same Google account through which you made the purchase. The Dr.Web key file will be downloaded automatically. More>>
I use the commercial version of Dr.Web for Android (not a lifetime license). What data do I need to provide to the Doctor Web technical support service to get help?
If you're contacting technical support:
- From the Dr.Web page at Google Play, through My Dr.Web Portal, or via the support form on Doctor Web's site, specify your serial number or your Google Play order number and your Gmail address. If you do not have the order number, then you probably purchased the Dr.Web license from another site. In this case, you need to submit your serial number. You can find your serial number on My Dr.Web Portal.
- Use the link in your order confirmation — click on the link found in the support request form at Google Play, select the request topic, and ask your question. We will obtain all the required information from Google Play automatically.
If your license is still valid, use your new phone to log in at Google Play under the account that was used to purchase the license.
In My Apps, select Dr.Web and tap Install. A valid license will be recognized automatically.
- I lost my Dr.Web license. How can I recover the license purchased through Google Play?
- If your license has expired, you will not be able to restore it. Please buy a new license.
- If your license is still valid,-note that licenses purchased through Google Play are bound to the account under which they have been purchased.
- Make sure that this account is set as the primary account on the device.
- In the main Dr.Web window, select About.
My order was cancelled, but money was still debited from my account.
Chances are the funds have been blocked by the bank that issued your credit card. Doctor Web cannot influence bank policies. The funds will be returned to your account after a period defined by the bank. If the money is not returned to your account in 2-3 days after receiving confirmation from Google Play, contact your bank.
- I have purchased a new smart phone.How can I transfer my Dr.Web license to the device from my old smart phone?
- If your license has expired you cannot transfer it to another device. Buy a new license.
The purchase confirmation has been lost. How can I check my order number (for example, to contact Doctor Web's support service)?
If you have deleted the email confirming your purchase information, you can find the order number (transaction id) in Google Wallet — information on all your orders is stored there.
What purchase confirmation will I receive after paying for a license at Google Play?
You will receive an email receipt confirming your purchase. The email will contain your order number and order information, and a link for contacting Doctor Web's support service regarding questions concerning purchase, payment and refund. If you have not received such an email, please contact Google Play's support service — Doctor Web's support service won't be able to help until your payment has been received.
The list of your paid purchases can be found in Google Wallet. The list of applications that have been paid for and are thus available to you can be found in the My Apps section of your Google account.
Where can I find my Dr.Web serial number?
Only users of the shareware version of Dr.Web for Android (comprehensive security) have serial numbers, which become available to them after they pay for their license on My Dr.Web Portal. Serial numbers are displayed in the Portal’s license information section.
Within how many days of making a purchase can I apply to Doctor Web for a refund?
According to Google Play's refund policy and under the Agreement between Doctor Web and Google, you can apply for a refund no later than within 48 hours after payment is made.
Dr.Web for OS X
Are there viruses for OS X?
Yes. The first virus for an Apple computer was created in 1982. The first virus for OS X (Mac.Leap) appeared in 2006. In early 2009, the Trojan Mac.Iservice infected machines that comprised the iBot zombie network. In 2012, half a million of computers were connected to the botnet created by the Trojan BackDoor.Flashback. It was Doctor Web who first discovered this zombie network.
Can I cure quarantined files?
Yes, you can. Once a subsequent update is downloaded, you can try to cure a quarantined file.
How can I get a demo key?
Download the program's distribution at download.drweb.com/mac. Install Dr.Web for OS X. In the License Manager, select Demo license.
How can I increase validity of a demo key file?
There is no way to prolong a demo key—you need to purchase a commercial license.
How can I protect settings of Dr.Web for OS X against unauthorised modification?
By default, only anti-virus file monitor settings are protected. To change them, click on the lock icon in the bottom left corner of the SpIDer Guard window, enter the administrator password and make the necessary adjustments.
How can I test the product before I buy it?
For evaluation purposes, you can use the trial version. Download the distribution from Doctor Web's site at download.drweb.com/demoreq. The period of a demo license is 30 days.
You can also use the free scanner Dr.Web Light for OS X. The scanner incorporates state-of-the-art technologies to detect and eliminate viruses. You can use it to check your system, whenever you need to. However, Dr.Web for OS X is a more feature-packed product as compared with Dr.Web Light for OS X. It includes Dr.Web SpIDer Guard file monitor to scan files in real time.
How can I update Dr.Web for OS X manually?
Select Update in the program's main window.
How do I install Dr.Web for OS X?
Administrator privileges are required to install Dr.Web. After mounting the drive you will see the following window:

Select Dr.Web anti-virus for OS X . Read the Installation Wizard's welcome and click Continue. To continue the installation, read the License Agreement and accept its terms. After that select the disk onto which Dr.Web for OS X will be installed. Enter the administrator password. Then Dr.Web for OS X will be installed automatically. When finished, click Finish. You don’t need to restart your system after installation.
How do I register my serial number of Dr.Web for OS X?
If you purchased a license for Dr.Web for OS X and the program is already installed on your Mac
- In the main menu of Dr.Web for OS X, select License Manager. In the subsequent window select Get New License. Follow the registration steps and enter the serial number in the appropriate fields of the registration form. Your key file will be downloaded and placed in the required directory automatically.
If you purchased a license for Dr.Web for OS X and the program is not installed on your Mac
- Download the installation package at download.drweb.com/mac. During installation, in the License Manager, select Get New License.
- Enter the serial number in the appropriate fields in the registration form. Your key file will be downloaded and placed in the required directory automatically.
You can also register your serial number at Doctor Web's server at products.drweb.com/register.
How do I uninstall Dr.Web for OS X?
Administrator privileges are required to remove the anti-virus. After mounting the drive you will see the following window:
Select DrWeb4MacUninstaller. Read the Removal Wizard's welcome and click Uninstall. Enter administrator password. After that, Dr.Web for OS X will be removed automatically. When removal is completed, click Finish. Iit is recommended to reboot the computer after uninstallation.
How do I update Dr.Web for OS X?
You can choose to update the anti-virus automatically and manually on demand or according to the schedule.
How does malware penetrate OS X?
An attacker does not necessary need to hack into your computer to install malicious software. In most cases, unwanted programs get onto Macs due to careless of users when they visit legitimate sites, such as news portals. They can be compromised, so that infection gets onto computers of visitors regardless of their OS—in most cases, the target platform is detected and selected automatically.
Two simple conditions must be met for a system to get infected with BackDoor.Flashback.39: Java Virtual Machine must be installed in the system, and a user must load a compromised webpage in the browser.
Trojan.SMSSend family programs can be easily downloaded from various websites under the guise of a useful application. Today, adware for OS X is also rather common. For instance, Trojan.Yontoo.1 gets onto a Mac, if the user agrees to download and install a browser plug-in from certain sites, or downloads it under the guise of a media player, a program to improve video playback quality, a "download accelerator", etc.
There are also e-mail and removable data storage devices—the traditional media that spread malware with no regard to the operating system.
What does Dr.Web anti-virus for OS X protect against?
It defends your Mac from all types of malicious programs—including those created specifically for OS X. With the growing popularity of OS X, malware tends to target specifically this operating system. Incidents involving large-scale botnets comprised of infected Macs did occur: such Trojans as BackDoor.Flashback.39, Trojan.SMSSend and Trojan.Yontoo.1 still pose a threat to unprotected machines.
With Dr.Web for OS X., you can protect your system from these and many other malicious programs created to infect Macs as well as other operating systems. However, bear in mind that, while an update containing a corresponding virus definition has arrived, no anti-virus can protect your Mac against new malware, which hackers tested against latest versions of anti-virus engines. To protect against such malicious programs, you need to use advanced security tools and, of course, be careful when you visit certain sites.
What is iBot?
It is a botnet of infected Macs which took shape with emergence of the Trojan Mac.Iservice in January 2009. To date, it has several thousand computers and has managed to manifest itself in a number of DDoS-attacks.
What versions of Mac OS are supported by Dr.Web for OS X?
According to the documentation, OS X 10.7 and above are supported.
What viruses and malware does Dr.Web for OS X protect against?
Dr.Web for for OS X protects against viruses whose definitions are present in the Dr.Web virus database. They can be written to infect OS X as well as other platforms.
The non-signature detection technology Origins Tracing and heuristic analyser help neutralise threats yet unknown.
Dr.Web topics for MS Exchange
Why is an anti-virus required to protect a mail server?
Every day the Doctor Web virus monitoring service collects more than 250,000 new malicious programs, the most dangerous of which have been developed by professional virus writers who are members of criminal organizations. These programs focus on stealing money from single companies (or a series of “targeted” companies); the creators of these programs know what security systems are in use, and devise their malware accordingly.
It is commonly believed that by installing a protection system on a mail server, one can reduce the inflow of spam and the number of viruses in a company network, and speed the delivery of important emails. But apart from solving these problems, a modern mail server anti-virus also affords the opportunity to delete previously unknown malicious programs from mailboxes. Only by installing an anti-virus on a company mail server can one escape situations in which the server becomes a source of infection. An anti-virus can’t protect a server file system, because such anti-viruses can’t cure databases, including mail server databases.
How is it possible to protect a company's network against previously unknown malicious programs?
The latest malicious programs, undetected by all heuristic mechanisms, reach the virus monitoring laboratory, and thus their victims, only after criminals have begun spreading them.
It is imperative to take into account the probability of criminals being able to bypass a company’s security systems and access its network (or employees’ PCs) and also the possibility of criminals being able to impact the protection systems in use, with the goal of stopping their operation.
To minimize risks to mail servers in particular, user mailboxes should be scanned regularly with an anti-virus to check for the presence of previously unknown malicious programs.
How can I prevent criminals from bypassing the system?
No anti-virus can detect the newest malicious programs 100 percent of the time. Even tests designed to detect malicious programs created after the latest anti-virus update say nothing about an anti-virus’s capacity to reveal the ‘infection’ created by criminals familiar with the anti-virus. Such anti-virus programs will not be detected by an anti-virus right up to the moment the necessary update is received.
That’s why the choice of an anti-virus should not be based on “test” results, but on an understanding of the following features of an anti-virus system:
- An anti-virus has to have a reliable system of self-protection— criminals must not be able to disable the anti-virus (or one of its components).
- Anti-virus updating and control systems must be completely under the control of the anti-virus’s self-protection system and must not use system components that are not under its control.
Once a company’s computers fall into a botnet, they often become a source of spam, and that harms the company’s reputation among its partners. Using Dr.Web Mail Security Suite and Dr.Web Desktop Security Suite will significantly reduce a company’s risk of becoming compromised by being blacklisted and disconnected from the Internet for acting as a spam bot.
A system for scanning mail traffic must be installed on the server as well as on the work stations, because incoming and outgoing messages go not only through a company’s mail server, but also directly through employees’ PCs (via SMTP, pop3/imap4 and closed links). In addition, the mail server (or the programs installed on it) can create mailings, including unwanted messages.
How can I test Dr.Web for MS Exchange before I buy it?
For evaluation purposes, you can use the trial version. Download the distribution from Doctor Web's site at https://download.drweb.com/demoreq. The demo license period is 30 days.
You can also take advantage of the Dr.Web LiveDemo remote testing service by filling out an application at https://download.drweb.com/live_demo. It should be noted that when testing a product via Dr.Web LiveDemo, the accompanying step-by-step instructions on how to test the product’s basic functionality are tremendously helpful.
Dr.Web ATM Shield
Can Dr.Web ATM Shield be used for Embedded OSs?
Yes. Dr.Web ATM Shield can be used not only for conventional OSs—Windows® XP Professional, Windows® Vista, Windows® 7 and Windows® 8—but also for Windows® XP Embedded, Windows® 7 Embedded, and Windows® 8 Embedded.
It must be remembered that some devices may lack various operating system components. This is a feature of Embedded OSs.
Can Dr.Web ATM Shield run on weak and obsolete configurations of embedded systems?
Dr.Web ATM Shield was developed with low-end platforms in mind¬¬¬. Dr.Web ATM Shield can run on an embedded device with just 512 MB of RAM.
It should be noted that Dr.Web products, including Dr.Web ATM Shield, are distinguished by compact virus databases and small size updates that make it possible to protect remote devices with ‘narrow’ Internet channel or a company network.
Does Dr.Web ATM Shield comply with regulatory requirements?
Dr.Web ATM Shield conforms to the anti-virus program requirements of the Federal Law on Personal Data (No. 152-FZ), FSTEC Russia’s orders No. 17 and No. 21, and other regulatory demands in the sphere of personal data protection.
When applied, Dr.Web ATM Shield meets the anti-virus program requirements of PCI DSS v2.0 and v3.0 standards.
Does your anti-virus have a PCI DSS certificate of compliance?
PCI DSS standards require only the fact that an anti-virus is being used and don’t make any claims about the functionality and features of the solution being used. Moreover, these standards stipulate the requirements for protecting devices in general, not their separate components. Therefore, the certificate isn’t provided for anti-viruses.
‘But Symantec has a PCI DSS certificate of compliance!’
Symantec has more than just anti-viruses in its portfolio. And the certificate you mentioned doesn’t belong to anti-virus software.
Is Dr.Web ATM Shield enough to protect embedded devices?
A peculiarity of the way embedded devices work (including ATMs) is that you cannot carry out updates (specifically, updates to the OS and applications launched on them) on them that may at some point require a device reboot as soon as update data is available — even if the system is busy.
Therefore, Dr.Web ATM Shield has two types of updates: virus database updates (that don’t require system restarts) and updates for Dr.Web ATM Shield’s basic components, including the drivers. Basic components updates, carried out when new types of malicious programs appear, may require a reboot of the protected device.
Because updates that potentially require a system restart can only be carried out during routine maintenance checks, it’s essential for employee home and work PCs to be protected by an anti-virus in order to prevent the newest malicious programs from penetrating removable data-storage devices used for routine maintenance.
The following routes of infection are typical for embedded systems:
The following routes of infection are typical for embedded systems:
- An infected company intranet, if embedded systems can be accessed from it;
- Vulnerabilities that exist due to the absence of security updates;
- Employee removable data-storage devices (including those that have been used for purposes other than embedded systems maintenance);
- Hacker-owned removable data-storage devices, if the hackers have unauthorized access to ATM equipment compartments;
- Internet sites visited by company personnel during maintenance periods.
Therefore, anti-virus protection that includes a traffic control module and an access restriction module for removable data-storage devices and Internet resources is essential for embedded systems to operate normally.
When do I need to use Dr.Web ATM Shield?
Dr.Web ATM Shield is required in all embedded devices that are subject to the requirements of PCI DSS and STO BR RF, and in all systems that can be infected through unknown vulnerabilities.
Dr.Web CureNet!
Can I launch Dr.Web CureNet! from CD/DVD?
No, you cannot, because Dr.Web CureNet! requires the Wizard to be installed on a LAN PC. This is, however, a great advantage of Dr.Web CureNet! — and you can launch the utility from USB data storage
Can I use Dr.Web CureNet! together with anti-virus products from other vendors simultaneously?
Yes, you can. Dr.Web CureNet! is designed to operate in a network environment protected with other security products.
How can I download Dr.Web CureNet!?
If the Dr.Web CureNet! serial number is not registered yet, please register it on this page. At the final stage of registration a link to download Dr.Web CureNet! personal distribution file will be generated.
If the Dr.Web CureNet! serial number is already registered, go to Dr.Web CureNet! personal area and download your Dr.Web CureNet! personal distribution file.
How can I get a demo key?
Download the program distribution demo file to evaluate Dr.Web CureNet! Remote curing is not available in demo version so you need to purchase a license to download fully functional Dr.Web CureNet! version.
How can I register Dr.Web CureNet! serial number?
You can register it on this page. At the final stage of registration a link to download Dr.Web CureNet! personal distribution file will be generated.
How can I update Dr.Web CureNet!?
In order to update Dr.Web CureNet!, you need to log into the Dr.Web CureNet! user personal area and download the latest version from there. Since a PC from which a LAN is scanned might not have an Internet access or its an access blocked by the provider, we strongly recommend to download an actual Dr.Web CureNet! version before scanning your network. Unique Dr.Web CureNet! distribution files are generated for each user.
How can I use this product?
You can use Dr.Web CureNet! for regular scans of your local network hosts if they are not protected by any other anti-virus, or if you suspect that the installed product doesn't detect some viruses.
Caution! Dr.Web CureNet! is not designed to provide constant anti-virus protection but perform only one-time scans. It doesn’t prevent malicious programs from infiltrating into a network between scanning sessions.
How is Dr.Web CureNet! licensed?
The product is licensed per number of workstations on which scanning followed by curing will be performed for 10, 30 or 365 days of use. Such license periods are used because Dr.Web CureNet! is designed for regular scanning but not to provide resident protection.
I already have an anti-virus installed. Why should I use Dr.Web CureNet!?
No anti-virus can detect all malicious programs currently in the wild, let alone the fact different anti-viruses vary significantly in terms of detection and curing capabilities. The number of viruses in the Internet is huge and new species appear very quickly. Regular local network “health” checks with Dr.Web CureNet! will help you verify reliability of your anti-virus software and cure computers in emergency situations when your anti-virus fails to neutralize a threat.
I am a Dr.Web Enterprise Suite user. How can I use Dr.Web CureNet! for free?
Register the serial number for the valid Dr.Web Enterprise Suite license.
You are allowed to use Dr.Web Enterprise CureNet! free of charge as long as the Dr.Web Enterprise Suite serial number is valid. However, your Dr.Web CureNet! personal distribution file will only be valid for 1 day. Therefore, you will have to register the serial number every time you need Dr.Web CureNet!. Every time a new Dr.Web CureNet! personal distribution file will be generated for you.
What is the difference between this new product and Dr.Web CureIt! or Dr.Web Enterprise Suite?
Dr.Web CureIt! is used to scan individual PCs and can fulfil needs of small companies. However, if there are many computers in the company, scanning each of them will take a lot of system administrator time and distract employees form their work. Dr.Web CureNet! allows performing scanning remotely over a network in the background so that a user can remain unaware of it. System administrator can operate from the single computer thus minimizing anti-virus influence on the performance of computers being scanned.
Dr.Web Enterprise Suite is designed to permanently protect the network. It is a very powerful product rich of numerous features. In order to use Dr.Web Enterprise Suite one has to deploy it on all hosts while with Dr.Web CureNet! you won’t need to deploy or install anything. Moreover, scanners will remove themselves from target hosts upon completion of scanning.
Dr.Web LiveDisk
How can I create Boot CD?
For more details on how to create boot CD, please refer here. You can also use our video tutorial to visually learn how boot CD is created.
How can I create a boot flash drive?
Download Dr.Web LiveUSB distribution file from our website, connect your flash drive to your PC and run the file you have downloaded. In the next window, specify which of flash drives you want to use (if a number of them is available), and also if it needs formatting before use. Press Create Dr.Web LiveUSB and wait for the process to complete. After Dr.Web LiveUSB has been created, press Exit.
How can I scan my PC for viruses when booting from LiveCD or LiveUSB?
To start scanning, press Dr.Web in the bottom left-hand corner of the screen (acts like Windows Start button) and select Dr.Web Sсanner. Selecting objects to be scanned and starting/stopping the scanner is similar to those of the standard Dr.Web Anti-Virus interface.
My PC automatically boots from the hard drive. How can I boot from a flash drive?
Most present-day desktop and notebook PCs have a key to select booting from any media type available in the PC. It is normally F11 key. When pressed, a boot device selection menu is displayed.
In previous BIOS versions, you may select boot device manually. Just enter BIOS by pressing Del or F2 key during booting, open Boot Settings (or sometimes simply Boot) section and change the boot sequence (USB or Removable device should be set to the first position depending on your PC BIOS version).
My PC automatically boots from the hard drive. How can I make it boot from the CD?
Most present-day desktop and notebook PCs have a key to select booting from any media type available in the PC. It is normally F11 key. When pressed, a boot device selection menu is displayed.
In previous BIOS versions, you may select boot device manually. Just enter BIOS by pressing Del or F2 key during booting, open Boot Settings (or sometimes simply Boot) section and change the boot sequence (CD-ROM should be set to the first position).
What is Dr.Web LiveCD and its purpose?
Dr.Web LiveCD is an emergency system recovery disk. Using Dr.Web LiveCD to boot your PC, you can check it for viruses and cure damaged Windows even if the system can no longer be started in its normal way.
What is Dr.Web LiveUSB and its purpose?
Dr.Web LiveUSB is an emergency system recovery tool using USB data storage. Using Dr.Web LiveUSB to boot your PC, you can check it for viruses and cure damaged Windows even if the system can no longer be started in its normal way.
Where can I download Dr.Web LiveCD and Dr.Web LiveUSB documentation?
Dr.Web LiveCD documentation is available for download on this page in the Documentation section, and Dr.Web LiveUSB’s is here, in the same Documentation section.
Niczego nie znaleziono